Identifying Subtle Changes in Exterior Walls

Identifying Subtle Changes in Exterior Walls

* Understanding the Significance of Exterior Wall Inspection for Foundation Health


Okay, let's talk about your house, specifically, the walls on the outside and why giving them a good once-over is surprisingly important for something you can't even see: your foundation. Preventative maintenance can reduce the need for extensive foundation repairs home foundation repair service interior design. Think of your exterior walls as the foundation's early warning system. They're often the first place subtle problems down below will telegraph their distress. We're not talking about major cracks that scream 'Houston, we have a problem!'. We're talking about the *subtle* changes, the things your eye might just gloss over if you're not paying attention.

Why bother, you ask? Well, your foundation is what's holding everything up, literally. If it starts to fail, even a little bit, it can lead to a cascade of problems. Ignoring these early warning signs can mean a small, relatively inexpensive fix turns into a major, wallet-busting renovation down the line. Nobody wants that.

So, what are we looking for? Pay attention to cracks, even hairline ones. Are they new? Have they gotten bigger? Are they vertical, horizontal, or stair-stepping? Stair-stepping cracks, which follow the mortar lines in brick or block walls, are often a sign of foundation settlement. Bulging or bowing walls are also a major red flag. Also, look for areas where the siding appears distorted or uneven. This could indicate that the wall beneath is shifting or sinking.

And don't forget to check around windows and doors. Are they sticking? Are there cracks radiating out from the corners? These can be signs that the wall around them is under stress due to foundation movement.

The key is to be observant and proactive. A regular exterior wall inspection, even just a quick walk-around a few times a year, can help you catch these subtle changes early. And if you do spot something that concerns you, don't hesitate to call in a professional. A foundation expert can assess the situation and recommend the best course of action, potentially saving you a lot of money and headaches in the long run. Think of it as preventative medicine for your house – a little attention now can save a whole lot of pain later.

* Recognizing Normal vs. Abnormal Wall Features in Residential Structures


Okay, so you're walking around a house, right? Maybe you're thinking about buying it, or maybe you're just doing a routine check. Either way, the walls are talking to you, even if you don't realize it. They're telling a story about the house's history, its health, and maybe even its future. The trick is learning to listen. And that means recognizing what "normal" looks like versus what screams "abnormal."

Think about it. A perfectly smooth, uniformly colored wall isn't necessarily normal. It's *ideal*, maybe, but real houses settle, they age, they breathe. So you're looking for subtle stuff. A slight bow in a long wall might just be imperfect framing. But if it's accompanied by cracks, especially stair-step cracks that follow the mortar lines in brick or block, that's a whole different ballgame. That suggests foundation movement, and that's a problem that needs professional attention.

Likewise, a little bit of staining around a window? Could be nothing more than rain runoff. But if that staining is excessive, or if the paint is blistering and peeling, that points to a moisture problem. Maybe a leaky window, maybe a problem with the roof diverting water incorrectly. Again, something worth investigating further.

And it's not just about the big obvious things. Sometimes, the subtle stuff is the most telling. A patch of slightly different colored brick could indicate a previous repair. That's not inherently bad, but you'd want to know *why* the repair was needed in the first place. Was it just cosmetic damage, or was there a structural issue that's been addressed?

Basically, you're trying to build a mental picture of what a healthy, well-maintained wall *should* look like, given the age and style of the house. Then, anything that deviates from that picture – a subtle discoloration, a slight bulge, an unusual pattern of cracks – becomes a clue. It's not about being an expert overnight, but about noticing the details, asking questions, and knowing when to call in someone who *is* an expert to take a closer look. Because those subtle changes in exterior walls? They can be the first whispers of bigger, more expensive problems down the road.

* Common Types of Subtle Exterior Wall Changes Indicating Foundation Issues


Okay, so you're walking around your house, maybe admiring the landscaping, and you glance up at the exterior walls. Everything *looks* fine, right? But sometimes, your foundation is trying to tell you something, and it's whispering, not shouting. Those whispers are often subtle changes to your exterior walls, and catching them early can save you a world of headache (and a mountain of money).

Think of it like this: your foundation is the bones, and the walls are the skin. If the bones shift, the skin's going to show it somehow. What are some of these subtle "skin" changes? Well, for starters, look for cracks. We're not talking about hairline cracks that are just settling – those are usually no big deal. We're talking about cracks that are wider than a pencil lead, or that are stair-stepping along brickwork, or that are appearing suddenly. These can indicate that the foundation is shifting and pulling on the walls.

Another thing to watch out for is bulging. If a section of your wall looks like it's pushing outwards, even slightly, that's a red flag. It might be harder to spot, so try looking at the wall from different angles, especially from a distance. Bulging often means there's pressure from the inside, maybe from soil expanding against the foundation wall.

Then there's sticking doors and windows. This might seem like an interior problem, but if doors and windows that used to open and close smoothly are suddenly sticking or jamming, it could be because the wall around them is shifting. The change in the wall's alignment puts pressure on the frames, making them difficult to operate.

Finally, keep an eye out for displaced siding or brick. If you notice that your siding panels are no longer flush, or that bricks are starting to separate and create gaps, it could be a sign that the wall behind them is moving. This is especially concerning if the displacement is accompanied by any of the other signs mentioned above.

The key takeaway is to be observant. Regularly walk around your house and really *look* at the exterior walls. Don't dismiss small changes as insignificant. If you spot something that doesn't look quite right, document it with photos and dates. If you're concerned, it's always best to call in a foundation expert to take a look. It's better to be safe than sorry when it comes to the stability of your home.

* Techniques for Detecting Minor Cracks, Bulges, and Leans


Alright, so you're walking around, checking out the exterior walls of a building, right? You're not looking for gaping holes or obvious collapses. You're hunting for the *subtle* stuff, the little whispers of trouble brewing. We're talking minor cracks, bulges you can barely see, and leans that might just be your eyes playing tricks on you. How do you even begin to find these ghosts of structural problems?

Well, first, forget just glancing. You need to really *look*. Start with good lighting – early morning or late afternoon sun can cast shadows that highlight small imperfections. Get up close and personal. Run your hand along the wall, feel for slight variations in texture that could indicate a patched crack or a subtle bulge. Trust your fingertips!

For cracks, think about patterns. Are they hairline and random (probably just cosmetic shrinkage)? Or are they stair-stepping along mortar joints (potentially a sign of foundation movement)? A crack that widens over time? Definitely keep an eye on that one. A crack width gauge can be a handy tool for monitoring movement.

Bulges are trickier. A long, straight edge (like a spirit level or a metal ruler) held against the wall can reveal subtle deviations from a true plane. Look for areas where the straight edge doesn't sit flush. Also, pay attention to how light reflects off the wall. An unexpected highlight or shadow might indicate a slight outward curve.

And then there's the lean. This is where things get really subjective. Stand back and sight along the top of the wall, comparing it to a plumb line (you can even just hang a string with a weight). Is it truly vertical? Often, it's helpful to compare the lean to nearby walls. If *everything* leans the same way, it might just be the way the building was originally constructed. But if one section leans noticeably more than others, that's a red flag.

Ultimately, spotting these subtle changes is about careful observation, a little bit of detective work, and knowing what to look for. It's about paying attention to the small details that can tell a bigger story about the health of the building. And of course, if you see something that concerns you, calling in a qualified professional to assess the situation is always the best course of action.

* The Role of Professional Foundation Repair Services in Early Intervention


Okay, let's talk about your house. I mean, *really* talk about it. We all notice the big stuff, right? The obvious crack in the driveway, the paint peeling like a sunburned tourist. But what about those subtle whispers your house is sending? Those tiny cracks in the exterior walls that you might dismiss as "just settling?" That's where professional foundation repair services come in, acting like early intervention specialists for your home's well-being.

Think of it like this: a little twitch in your arm might be nothing, or it could be the first sign of something more serious. You wouldn't ignore it, would you? Your house deserves the same consideration. These guys, the foundation repair folks, they're trained to see those subtle shifts, those barely-there cracks, that might indicate a bigger problem brewing beneath the surface. They're like the doctors of your house, using their experience and specialized tools to diagnose potential issues before they turn into full-blown emergencies.

Why is early intervention so important? Well, ignoring these subtle changes is like ignoring that twitch until your whole arm is numb. A small, easily fixable foundation issue can snowball into something much larger and much more expensive if left unchecked. We're talking major structural damage, water intrusion, warped floors, even doors and windows that won't close properly. Suddenly, that "minor" crack has turned into a major headache and a significant hit to your wallet.

Professional foundation repair services don't just patch things up; they address the *root cause* of the problem. They understand the soil composition around your home, the drainage patterns, and the various factors that can contribute to foundation movement. This allows them to implement solutions that are not only effective but also long-lasting, preventing future issues from arising.

Ultimately, engaging a qualified foundation repair service for early intervention is an investment in the long-term health and stability of your home. It's about being proactive rather than reactive, catching problems early before they become overwhelming. It's about listening to those subtle whispers your house is sending and ensuring it remains a safe and sound haven for you and your family for years to come. So, next time you're admiring your home's exterior, take a closer look. Maybe, just maybe, it's trying to tell you something. And maybe, just maybe, it's time to call in the professionals.

* Documenting and Reporting Exterior Wall Changes for Accurate Diagnosis


Okay, so you're trying to figure out what's going on with your exterior walls, right? Maybe you've noticed something… different. A slight discoloration, a hairline crack, a weird bulge you swear wasn't there before. The thing is, those subtle changes? They're clues. And like any good detective, you need to document them meticulously to get the real story. That's where documenting and reporting exterior wall changes becomes super important for accurate diagnosis.

Think of it this way: your exterior walls are constantly battling the elements. Sun, rain, wind, ice… it all takes a toll. And sometimes, the damage isn't immediately obvious. Maybe water is seeping in behind the siding, causing rot that you can't see. Or maybe there's a slow, creeping foundation issue that's putting stress on the wall. If you just ignore it, you're letting the problem fester and potentially turn into something much bigger (and much more expensive!).

So, how do you document these subtle changes? Start with the basics. Grab a notebook and a camera (your phone works great). Walk around the entire perimeter of your house, looking closely at the walls. Note down anything that seems out of the ordinary. Cracks, even tiny ones, should be documented. Measure their length and width (roughly is fine). Take pictures of everything. Zoom in on the details. Make sure to note the location of each change – is it near a window, a door, the foundation? The more specific you are, the better.

Don't just rely on your memory. Human memory is notoriously faulty. Write everything down as you see it. Include the date and time of your observation. Over time, you might notice that a crack is getting bigger, or a discoloration is spreading. Having dated records will help you track the progression of the problem.

Now, about reporting. Once you've gathered your evidence, what do you do with it? Well, if you're concerned about the structural integrity of your house, or if you suspect a serious issue, you need to share your findings with a professional. A qualified contractor, a structural engineer, or even a home inspector can assess the situation and give you an accurate diagnosis. Provide them with your detailed documentation – your notes, your photos, everything. The more information you give them, the better equipped they'll be to figure out what's going on and recommend the best course of action.

In the end, documenting and reporting exterior wall changes is about being proactive. It's about catching small problems before they become big ones. It's about protecting your investment and ensuring the long-term health of your home. So, keep an eye on those walls. They're trying to tell you something. And with a little careful observation and documentation, you can be sure you're listening.

* Preventative Measures to Minimize Foundation Problems and Wall Damage


Okay, so you're starting to notice some little things with your exterior walls, right? Maybe a hairline crack here, a slight bulge there. Before you panic and imagine your house crumbling, let's talk about keeping those little changes from becoming big, expensive nightmares. We're talking preventative measures, the kind that save you headaches (and money) down the road.

Think of your foundation and walls as a team. If the foundation is weak, the walls are going to suffer. So, first things first: water management. Water is enemy number one. Make sure your gutters are clear and directing water well away from the foundation. Seriously, check them after every big storm. Proper grading around your house is also crucial. The ground should slope away from the foundation, again, to divert water. If water is pooling near your foundation, that's a red flag waving frantically. Consider adding extensions to downspouts or even installing a French drain if you have persistent water issues.

Next, think about vegetation. Those beautiful trees and shrubs? Their roots can be surprisingly aggressive. They can burrow under foundations, causing cracks and instability. Keep trees trimmed back and plant new ones a safe distance away from your house. The same goes for bushes. Make sure they aren't constantly rubbing against the walls, which can trap moisture and damage the siding.

Finally, a little TLC goes a long way. Regularly inspect your exterior walls. Look for cracks, discoloration, or any areas that seem damp or soft. Patch any small cracks promptly. Recaulk around windows and doors to prevent water intrusion. A good coat of paint can also protect your walls from the elements. These little maintenance tasks are like vitamins for your house, keeping it strong and healthy and preventing those subtle changes from turning into major problems. By being proactive, you can keep your foundation solid and your walls standing tall for years to come.


(Learn how and when to remove this message)

Radon mitigation is any process used to reduce radon gas concentrations in the breathing zones of occupied buildings, or radon from water supplies. Radon is a significant contributor to environmental radioactivity and indoor air pollution. Exposure to radon can cause serious health problems such as lung cancer.[1]

Mitigation of radon in the air by active soil depressurization is most effective. Concrete slabs, sub-floors, and/or crawlspaces are sealed, an air pathway is then created to exhaust radon above the roof-line, and a radon mitigation fan is installed to run permanently. In particularly troublesome dwellings, air exchangers can be used to reduce indoor radon concentrations. Treatment systems using aeration or activated charcoal are available to remove radon from domestic water supplies. There is no proven link between radon in water and gastrointestinal cancers; however, extremely high radon concentrations in water can be aerosolized by faucets and shower heads and contribute to high indoor radon levels in the air.

Testing

[edit]
A typical radon test kit
Fluctuation of ambient air radon concentration over one week, measured in a laboratory

The first step in mitigation is testing. No level of radiation is considered completely safe, but as it cannot be eliminated, governments around the world have set various action levels to provide guidance on when radon concentrations should be reduced. The World Health Organization's International Radon Project has recommended an action level of 100 Bq/m3 (2.7 pCi/L) for radon in the air.[2] Radon in the air is considered to be a larger health threat than radon in domestic water. The US Environmental Protection Agency recommendation is to not test for radon in water unless a radon in air test shows concentrations above the action level. However, in some U.S. states such as Maine where radon levels are higher than the national average, it is recommend that all well water should be tested for radon. The U.S. government has not set an action level for radon in water.

Air-radon levels fluctuate naturally on a daily and seasonal basis. A short term test (90 days or less) might not be an accurate assessment of a home's average radon level, but is recommended for initial testing to quickly determine unhealthy conditions. Transient weather such as wind and changes in barometric pressure can affect short-term concentrations as well as ventilation, such as open windows and the operation of exhaust fans.

Testing for radon in the air is accomplished using passive or active devices placed in the building. Some devices are promptly sent to a laboratory for analysis, others calculate the results on-site including digital Radon detectors. Radon-in-water testing requires a water sample being sent to a laboratory.

Retesting is recommended in several situations, for example, before spending money on the installation of a mitigation system. Test results which exceed accuracy tolerances also require re-testing. When a mitigation system installation is warranted, a retest after the system is functional is advised to be sure the system is effectively reducing the radon concentration below the action level, and after any mitigation system repairs such as replacing a fan unit. The US EPA recommends retesting homes with radon problems every two years to ensure proper system function. Due to the vast fluctuation in indoor radon levels, the EPA recommends all homes be tested at least once every five years.[3]

Testing in the United States

[edit]
Radon map of the United States

ASTM E-2121 is a US standard for reducing airborne radon in homes as far as practicable below the action level of 4 picocuries per liter (pCi/L) (148 Bq/m3).[4][5] Some states recommend achieving 2.0 pCi/L or less.

Radon test kits are commercially available[6] and can be used by homeowners and tenants and in limited cases by landlords, except when a property is for sale.

Commercially available test kits include a passive collector that the user places in the lowest livable floor of the house for 2 to 7 days. The user then sends the collector to a laboratory for analysis. Long-term kits, taking collections from 91 days to one year, are also available. Open land test kits can test radon emissions from the land before construction begins, but are not recommended by the EPA because they do not accurately predict the final indoor radon level. The EPA and the National Environmental Health Association have identified 15 types of radon test devices.[7] A Lucas cell is one type of device.

Retesting is specifically recommended in several situations. Measurements between 4 and 10 pCi/L (148 and 370 Bq/m3) warrant a follow-up short-term or long-term radon test before mitigation. Measurements over 10 pCi/L (370 Bq/m3) warrant only another short-term test (not a long-term test) so that abatement measures are not unduly delayed.

Progress has been made regarding radon in the home. A total of 37 states have now[when?] passed legislation requiring home-sellers to disclose known radon levels before completing the transaction (although only a handful have introduced criminal penalties for misrepresentation).[8] And over half the legislatures have written radon into their state's building code.[9] Purchasers of real estate may delay or decline a purchase if the seller has not successfully abated radon to less than 4 pCi/L.

The accuracy of the residential radon test depends upon whether closed house conditions are maintained. Thus the occupants will be instructed not to open windows, etc., for ventilation during the pendency of test, usually two days or more. However, the occupants, if the present owners, will be motivated to pass the test and insure the sale, so they might be tempted to open a window to get a lower radon score. Moreover, there may be children or immature teens or young adults in the house who will open a window for ventilation notwithstanding instructions not to do so, particularly in uncomfortably hot weather. Accordingly, whether the potential purchaser should trust the result of such a test is problematic.

Management of radon service provider certification has evolved since being introduced by the EPA in 1986. In the 1990s this service was "privatized" and the National Environmental Health Association (NEHA) helped transition the voluntary National Radon Proficiency Program (NRPP) to be administered by private firms. As of 2012, the NRPP is administered by the American Association of Radon Scientists and Technologists (AARST).[10]

Some states, such as Maine, require landlords to test their rental properties and turn the results in to the state. In limited cases the landlord or tenants may do the testing themselves. The rules in each state vary. In many cases there are private contractors that will inspect hired by the city.

Testing in Canada

[edit]

Health Canada recommends regular annual testing, either by hiring a qualified tester or by using a home-testing kit that should be checked quarterly.[11]

Canadian Government, in conjunction with the territories and provinces, developed the guideline[12] to indicate when remedial action should be taken was originally set at 800 Bq/m3 (becquerels per cubic meter) and since reduced to 200 Bq/m3. This new guideline was approved by the Federal Provincial Territorial Radiation Protection Committee in October 2006.[13]

Testing in the UK

[edit]

Radon testing in the UK is managed by UKradon and the UKHSA.[14]

Testing in Norway

[edit]

The Norwegian Radiation and Nuclear Safety Authority (DSA) developed the protocol[15] for radon measurements in residential dwellings[16] with respect to rental accommodation, which is governed by The Radiation Protection Regulations.[17]

Methods of radon gas mitigation

[edit]
Part of a radon mitigation system including the fan and vent pipe is visible near the gutter downspout.

Because high levels of radon have been found in every state of the United States,[18] testing for radon and installing radon mitigation systems has become a specialized industry since the 1980s. Many states have implemented programs that affect home buying and awareness in the real estate community; however, radon testing and mitigation systems are not generally mandatory unless specified by the local jurisdiction.[19]

Anticipated high radon levels can be mitigated during building design and construction by a combination of ensuring a perfectly sealed foundation, allowing sufficient passive dispersal of under-slab gas around rather than through the building, and proper building ventilation. In many instances, such approaches may achieve a sufficient reduction of radon levels compared to other buildings where such approaches were not taken. However, quality of implementation is crucial and testing after construction is necessary. For instance, even a small gap in the sealing of the slab may be sufficient for excessive quantities of radon to enter, given pressure differentials.

Where such approaches were not taken during construction or have proven insufficiently effective, remediation is needed. According to the EPA's "A Citizen's Guide to Radon",[20] the method to reduce radon "primarily used is a vent pipe system and fan, which pulls radon from beneath the house and vents it to the outside", which is also called sub-slab depressurization, soil suction, or active soil depressurization (ASD). Generally indoor radon can be mitigated by sub-slab depressurization and exhausting such radon-laden air to the outdoors, away from windows and other building openings.[21] "EPA generally recommends methods which prevent the entry of radon. Soil suction, for example, prevents radon from entering your home by drawing the radon from below the home and venting it through a pipe, or pipes, to the air above the home where it is quickly diluted" and "EPA does not recommend the use of sealing alone to reduce radon because, by itself, sealing has not been shown to lower radon levels significantly or consistently" according to the EPA's "Consumer's Guide to Radon Reduction: How to Fix Your Home".[22] Ventilation systems can utilize a heat exchanger or energy recovery ventilator to recover part of the energy otherwise lost in the process of exchanging air with the outside. For crawlspaces, the EPA states,[22] "An effective method to reduce radon levels in crawlspace homes involves covering the earth floor with a high-density plastic sheet. A vent pipe and fan are used to draw the radon from under the sheet and vent it to the outdoors. This form of soil suction is called submembrane suction, and when properly applied is the most effective way to reduce radon levels in crawlspace homes."

High radon levels in a Minnesota (USA) basement with a passive under slab vent pipe system can be seen in the left half of the graph. After installation of a radon fan (ASD), a permanent reduction in radon levels to approximately 0.6 pCi/L can be seen in the right half of the graph.
  • The most common approach is active soil depressurization (ASD). Experience has shown that ASD is applicable to most buildings since radon usually enters from the soil and rock underneath and mechanical ventilation is used when the indoor radon is emitted from the building materials. A less common approach works efficiently by reducing air pressures within cavities of exterior and demising walls where radon emitting from building materials, most often concrete blocks, collects.
  • Above slab air pressure differential barrier technology (ASAPDB) requires that the interior pressure envelope, most often drywall, as well as all ductwork for air conditioning systems, be made as airtight as possible. A small blower, often no more than 15 cubic feet per minute (0.7 L/s) may then extract the radon-laden air from these cavities and exhaust it to the out of doors. With well-sealed HVAC ducts, very small negative pressures, perhaps as little as 0.5 pascal (0.00007 psi), will prevent the entry of highly radon-laden wall cavity air from entering into the breathing zone. Such ASAPDB technology is often the best radon mitigation choice for high-rise condominiums as it does not increase indoor humidity loads in hot humid climates, and it can also work well to prevent mold growth in exterior walls in heating climates.
  • In hot, humid climates, heat recovery ventilators (HRV) as well as energy recovery ventilators (ERV) have a record of increasing indoor relative humidity and dehumidification demands on air conditioning systems. Mold problems can occur in homes that have been radon mitigated with HRV and ERV installations in hot, humid climates.[citation needed] HRVs and ERVs have an excellent record in cold dry climates.
  • A recent technology is based on building science. It includes a variable rate mechanical ventilation system that prevents indoor relative humidity from rising above a preset level such as 50% which is currently suggested by the US Environmental Protection Agency and others as an upper limit for the prevention of mold. It has proven to be especially effective in hot, humid climates. It controls the air delivery rate so that the air conditioner is never overloaded with more moisture than it can effectively remove from the indoor air.
    • It is generally assumed that air conditioner operation will remove excess moisture from the air in the breathing zone, but it is important to note that just because the air conditioner cools does not mean that it is also dehumidfying. If Δt is 14 degrees or less, it may not dehumidify at all even though it is cooling.
    • Factors that are likely to aggravate indoor humidity problems from mechanical ventilation–based radon installations are as follows and an expert radon mitigator/building scientist will check for and correct any and all of the following when he or she performs radon mitigation procedures:
      • Air conditioner duct leaks located outside the breathing zone, such as in the attic.
      • Excessive exhaust fan operation
      • Oversize or over-capacity air conditioners
      • AC air handler fans that do not stop running when the air conditioner compressor stops running.
      • Delta tt), which is the amount that the air is cooled as it is passed through the air conditioner's cooling coils. A good Δt performance figure for home air conditioners is about 20 °F (11 °C). In comparison, automobile air conditioners deliver Δt performance of 32 to 38 °F (18 to 21 °C). A Δt of 14 °F (8 °C) will dehumidify poorly if at all.

In South Florida, most radon mitigation is performed by use of fixed rate mechanical ventilation. Radon mitigation training in Florida does not include problems associated with mechanical ventilation systems, such as high indoor humidity, mold, moldy odors, property damage or health consequences of human occupation in high humidity of moldy environments[citation needed]. As a result, most Florida radon mitigators are unaware of and do not incorporate existing building science moisture management technology into mechanical ventilation radon installations. Home inspectors may not necessarily be aware of the mold risks associated with radon mitigation by mechanical ventilation.

The average cost for an ASD radon mitigation system in Minnesota is $1500.[23] These costs are very dependent on the type of home and age of construction.[24]

Methods of radon-in-water mitigation

[edit]

Radon removal from water supplies may be at a treatment plant, point of entry, or point of use. Public water supplies in the United States were required to treat for radionuclides beginning in 2003 but private wells are not regulated by the federal government as of 2014. The radon can be captured by granular activated charcoal (GAR) or released into the air through aeration of the water. Radon will naturally dissipate from water over a period of days, but the quantity of storage needed to treat the water in this manner makes home systems of this type impracticably large.[25]

Activated carbon systems capture radon from the water. The amount of radiation accumulates over time and the filter material may reach the level of requiring disposal as a radioactive waste. However, in the United States there are no regulations concerning radiation levels and disposal of radon treatment waste as of 2014.

Aeration systems move the radon from the water to the air. Radon gas discharged into the air is the release of a pollutant, and may become regulated in the United States.

References

[edit]
  1. ^ Nunnally, Diamond (2022-03-30). "Dangerous radon gas dangers and detection tips". WBMA. Retrieved 2022-04-10.
  2. ^ WHO Handbook on Indoor Radon: A Public Health Perspective. World Health Organization. 2009.
  3. ^ US EPA, OAR (2013-08-27). "Radon". www.epa.gov. Retrieved 2023-02-04.
  4. ^ "Recommended Residential Radon Mitigation Standard of Practice". United States Environmental Protection Agency. Archived from the original on 2008-01-16. Retrieved 2008-02-02.
  5. ^ "ASTM E2121-03 Standard Practice for Installing Radon Mitigation Systems in Existing Low-Rise Residential Buildings". ASTM International. Retrieved 2008-02-02.
  6. ^ "Commercially Available Radon Kits". Alpha Energy Labs. Archived from the original on 2012-07-12. Retrieved 2012-04-19.
  7. ^ "Radon Measurement Method Definitions". The National Environmental Health Association—National Radon Proficiency Program. Archived from the original on 2007-12-24. Retrieved 2008-02-02.
  8. ^ "State Radon Laws". lawatlas.org. Retrieved 2021-07-12.
  9. ^ "National Conference of State Legislatures (NCSL) - Radon".
  10. ^ "National Radon Proficiency Program - NEHA and NEHA-NRPP History". Nrpp.info. Retrieved 2015-03-30.
  11. ^ "Home radon testing important for health". lethbridgeherald.com. 18 March 2022. Retrieved 2022-04-10.
  12. ^ "Radon Gas | Vancouver, BC, Canada". Radoncontrol.ca. Retrieved 2015-03-30.
  13. ^ "Radon Frequently Asked Questions - Health Canada". Hc-sc.gc.ca. 2014-07-30. Retrieved 2015-03-30.
  14. ^ "UKradon - Home". www.ukradon.org.
  15. ^ "Radon measurements in residential dwellings".
  16. ^ "Radon boliger 2013" (PDF).
  17. ^ "Legislation".
  18. ^ "Radon: Myth vs Fact". Radon-Rid/EPA. Retrieved 2009-11-13.
  19. ^ "Listing of States and Jurisdictions with RRNC Codes". EPA. Retrieved 2009-11-13.
  20. ^ "A Citizen's Guide to Radon" (PDF). EPA. Retrieved 2024-12-27.
  21. ^ "Radon Mitigation Methods". Radon Solution. Archived from the original on 2008-12-15. Retrieved 2008-12-02.
  22. ^ a b "Consumer's Guide to Radon Reduction: How to Fix Your Home" (PDF). EPA.
  23. ^ "Radon Mitigation System - EH: Minnesota Department of Health". Health.state.mn.us. 2014-12-10. Retrieved 2019-03-26.
  24. ^ "Featured Radon Mitigation System Archives". Radonreductioninc.com. Retrieved 2015-03-30.
  25. ^ ""Radon in Drinking Water Health Risk Reduction and Cost Analysis: Notice"" (PDF). Federal Register. 64. February 26, 1999. Retrieved 2015-03-30.
[edit]
  • Radon at the United States Environmental Protection Agency
  • National Radon Program Services hosted by Kansas State University
  • Radon and Lung Health from the American Lung Association
  • It's Your Health - Health Canada
  • Radon's impact on your health – Quebec Lung Association


Boston's Big Dig presented geotechnical challenges in an urban environment.
Precast concrete retaining wall
A typical cross-section of a slope used in two-dimensional analyzes.

Geotechnical engineering, also known as geotechnics, is the branch of civil engineering concerned with the engineering behavior of earth materials. It uses the principles of soil mechanics and rock mechanics to solve its engineering problems. It also relies on knowledge of geology, hydrology, geophysics, and other related sciences.

Geotechnical engineering has applications in military engineering, mining engineering, petroleum engineering, coastal engineering, and offshore construction. The fields of geotechnical engineering and engineering geology have overlapping knowledge areas. However, while geotechnical engineering is a specialty of civil engineering, engineering geology is a specialty of geology.

History

[edit]

Humans have historically used soil as a material for flood control, irrigation purposes, burial sites, building foundations, and construction materials for buildings. Dykes, dams, and canals dating back to at least 2000 BCE—found in parts of ancient Egypt, ancient Mesopotamia, the Fertile Crescent, and the early settlements of Mohenjo Daro and Harappa in the Indus valley—provide evidence for early activities linked to irrigation and flood control. As cities expanded, structures were erected and supported by formalized foundations. The ancient Greeks notably constructed pad footings and strip-and-raft foundations. Until the 18th century, however, no theoretical basis for soil design had been developed, and the discipline was more of an art than a science, relying on experience.[1]

Several foundation-related engineering problems, such as the Leaning Tower of Pisa, prompted scientists to begin taking a more scientific-based approach to examining the subsurface. The earliest advances occurred in the development of earth pressure theories for the construction of retaining walls. Henri Gautier, a French royal engineer, recognized the "natural slope" of different soils in 1717, an idea later known as the soil's angle of repose. Around the same time, a rudimentary soil classification system was also developed based on a material's unit weight, which is no longer considered a good indication of soil type.[1][2]

The application of the principles of mechanics to soils was documented as early as 1773 when Charles Coulomb, a physicist and engineer, developed improved methods to determine the earth pressures against military ramparts. Coulomb observed that, at failure, a distinct slip plane would form behind a sliding retaining wall and suggested that the maximum shear stress on the slip plane, for design purposes, was the sum of the soil cohesion, , and friction , where is the normal stress on the slip plane and is the friction angle of the soil. By combining Coulomb's theory with Christian Otto Mohr's 2D stress state, the theory became known as Mohr-Coulomb theory. Although it is now recognized that precise determination of cohesion is impossible because is not a fundamental soil property, the Mohr-Coulomb theory is still used in practice today.[3]

In the 19th century, Henry Darcy developed what is now known as Darcy's Law, describing the flow of fluids in a porous media. Joseph Boussinesq, a mathematician and physicist, developed theories of stress distribution in elastic solids that proved useful for estimating stresses at depth in the ground. William Rankine, an engineer and physicist, developed an alternative to Coulomb's earth pressure theory. Albert Atterberg developed the clay consistency indices that are still used today for soil classification.[1][2] In 1885, Osborne Reynolds recognized that shearing causes volumetric dilation of dense materials and contraction of loose granular materials.

Modern geotechnical engineering is said to have begun in 1925 with the publication of Erdbaumechanik by Karl von Terzaghi, a mechanical engineer and geologist. Considered by many to be the father of modern soil mechanics and geotechnical engineering, Terzaghi developed the principle of effective stress, and demonstrated that the shear strength of soil is controlled by effective stress.[4] Terzaghi also developed the framework for theories of bearing capacity of foundations, and the theory for prediction of the rate of settlement of clay layers due to consolidation.[1][3][5] Afterwards, Maurice Biot fully developed the three-dimensional soil consolidation theory, extending the one-dimensional model previously developed by Terzaghi to more general hypotheses and introducing the set of basic equations of Poroelasticity.

In his 1948 book, Donald Taylor recognized that the interlocking and dilation of densely packed particles contributed to the peak strength of the soil. Roscoe, Schofield, and Wroth, with the publication of On the Yielding of Soils in 1958, established the interrelationships between the volume change behavior (dilation, contraction, and consolidation) and shearing behavior with the theory of plasticity using critical state soil mechanics. Critical state soil mechanics is the basis for many contemporary advanced constitutive models describing the behavior of soil.[6]

In 1960, Alec Skempton carried out an extensive review of the available formulations and experimental data in the literature about the effective stress validity in soil, concrete, and rock in order to reject some of these expressions, as well as clarify what expressions were appropriate according to several working hypotheses, such as stress-strain or strength behavior, saturated or non-saturated media, and rock, concrete or soil behavior.

Roles

[edit]

Geotechnical investigation

[edit]

Geotechnical engineers investigate and determine the properties of subsurface conditions and materials. They also design corresponding earthworks and retaining structures, tunnels, and structure foundations, and may supervise and evaluate sites, which may further involve site monitoring as well as the risk assessment and mitigation of natural hazards.[7][8]

Geotechnical engineers and engineering geologists perform geotechnical investigations to obtain information on the physical properties of soil and rock underlying and adjacent to a site to design earthworks and foundations for proposed structures and for the repair of distress to earthworks and structures caused by subsurface conditions. Geotechnical investigations involve surface and subsurface exploration of a site, often including subsurface sampling and laboratory testing of retrieved soil samples. Sometimes, geophysical methods are also used to obtain data, which include measurement of seismic waves (pressure, shear, and Rayleigh waves), surface-wave methods and downhole methods, and electromagnetic surveys (magnetometer, resistivity, and ground-penetrating radar). Electrical tomography can be used to survey soil and rock properties and existing underground infrastructure in construction projects.[9]

Surface exploration can include on-foot surveys, geologic mapping, geophysical methods, and photogrammetry. Geologic mapping and interpretation of geomorphology are typically completed in consultation with a geologist or engineering geologist. Subsurface exploration usually involves in-situ testing (for example, the standard penetration test and cone penetration test). The digging of test pits and trenching (particularly for locating faults and slide planes) may also be used to learn about soil conditions at depth. Large-diameter borings are rarely used due to safety concerns and expense. Still, they are sometimes used to allow a geologist or engineer to be lowered into the borehole for direct visual and manual examination of the soil and rock stratigraphy.

Various soil samplers exist to meet the needs of different engineering projects. The standard penetration test, which uses a thick-walled split spoon sampler, is the most common way to collect disturbed samples. Piston samplers, employing a thin-walled tube, are most commonly used to collect less disturbed samples. More advanced methods, such as the Sherbrooke block sampler, are superior but expensive. Coring frozen ground provides high-quality undisturbed samples from ground conditions, such as fill, sand, moraine, and rock fracture zones.[10]

Geotechnical centrifuge modeling is another method of testing physical-scale models of geotechnical problems. The use of a centrifuge enhances the similarity of the scale model tests involving soil because soil's strength and stiffness are susceptible to the confining pressure. The centrifugal acceleration allows a researcher to obtain large (prototype-scale) stresses in small physical models.

Foundation design

[edit]

The foundation of a structure's infrastructure transmits loads from the structure to the earth. Geotechnical engineers design foundations based on the load characteristics of the structure and the properties of the soils and bedrock at the site. Generally, geotechnical engineers first estimate the magnitude and location of loads to be supported before developing an investigation plan to explore the subsurface and determine the necessary soil parameters through field and lab testing. Following this, they may begin the design of an engineering foundation. The primary considerations for a geotechnical engineer in foundation design are bearing capacity, settlement, and ground movement beneath the foundations.[11]

Earthworks

[edit]
A compactor/roller operated by U.S. Navy Seabees

Geotechnical engineers are also involved in the planning and execution of earthworks, which include ground improvement,[11] slope stabilization, and slope stability analysis.

Ground improvement

[edit]

Various geotechnical engineering methods can be used for ground improvement, including reinforcement geosynthetics such as geocells and geogrids, which disperse loads over a larger area, increasing the soil's load-bearing capacity. Through these methods, geotechnical engineers can reduce direct and long-term costs.[12]

Slope stabilization

[edit]
Simple slope slip section.

Geotechnical engineers can analyze and improve slope stability using engineering methods. Slope stability is determined by the balance of shear stress and shear strength. A previously stable slope may be initially affected by various factors, making it unstable. Nonetheless, geotechnical engineers can design and implement engineered slopes to increase stability.

Slope stability analysis
[edit]

Stability analysis is needed to design engineered slopes and estimate the risk of slope failure in natural or designed slopes by determining the conditions under which the topmost mass of soil will slip relative to the base of soil and lead to slope failure.[13] If the interface between the mass and the base of a slope has a complex geometry, slope stability analysis is difficult and numerical solution methods are required. Typically, the interface's exact geometry is unknown, and a simplified interface geometry is assumed. Finite slopes require three-dimensional models to be analyzed, so most slopes are analyzed assuming that they are infinitely wide and can be represented by two-dimensional models.

Sub-disciplines

[edit]

Geosynthetics

[edit]
A collage of geosynthetic products.

Geosynthetics are a type of plastic polymer products used in geotechnical engineering that improve engineering performance while reducing costs. This includes geotextiles, geogrids, geomembranes, geocells, and geocomposites. The synthetic nature of the products make them suitable for use in the ground where high levels of durability are required. Their main functions include drainage, filtration, reinforcement, separation, and containment.

Geosynthetics are available in a wide range of forms and materials, each to suit a slightly different end-use, although they are frequently used together. Some reinforcement geosynthetics, such as geogrids and more recently, cellular confinement systems, have shown to improve bearing capacity, modulus factors and soil stiffness and strength.[14] These products have a wide range of applications and are currently used in many civil and geotechnical engineering applications including roads, airfields, railroads, embankments, piled embankments, retaining structures, reservoirs, canals, dams, landfills, bank protection and coastal engineering.[15]

Offshore

[edit]
Platforms offshore Mexico.

Offshore (or marine) geotechnical engineering is concerned with foundation design for human-made structures in the sea, away from the coastline (in opposition to onshore or nearshore engineering). Oil platforms, artificial islands and submarine pipelines are examples of such structures.[16]

There are a number of significant differences between onshore and offshore geotechnical engineering.[16][17] Notably, site investigation and ground improvement on the seabed are more expensive; the offshore structures are exposed to a wider range of geohazards; and the environmental and financial consequences are higher in case of failure. Offshore structures are exposed to various environmental loads, notably wind, waves and currents. These phenomena may affect the integrity or the serviceability of the structure and its foundation during its operational lifespan and need to be taken into account in offshore design.

In subsea geotechnical engineering, seabed materials are considered a two-phase material composed of rock or mineral particles and water.[18][19] Structures may be fixed in place in the seabed—as is the case for piers, jetties and fixed-bottom wind turbines—or may comprise a floating structure that remains roughly fixed relative to its geotechnical anchor point. Undersea mooring of human-engineered floating structures include a large number of offshore oil and gas platforms and, since 2008, a few floating wind turbines. Two common types of engineered design for anchoring floating structures include tension-leg and catenary loose mooring systems.[20]

Observational method

[edit]

First proposed by Karl Terzaghi and later discussed in a paper by Ralph B. Peck, the observational method is a managed process of construction control, monitoring, and review, which enables modifications to be incorporated during and after construction. The method aims to achieve a greater overall economy without compromising safety by creating designs based on the most probable conditions rather than the most unfavorable.[21] Using the observational method, gaps in available information are filled by measurements and investigation, which aid in assessing the behavior of the structure during construction, which in turn can be modified per the findings. The method was described by Peck as "learn-as-you-go".[22]

The observational method may be described as follows:[22]

  1. General exploration sufficient to establish the rough nature, pattern, and properties of deposits.
  2. Assessment of the most probable conditions and the most unfavorable conceivable deviations.
  3. Creating the design based on a working hypothesis of behavior anticipated under the most probable conditions.
  4. Selection of quantities to be observed as construction proceeds and calculating their anticipated values based on the working hypothesis under the most unfavorable conditions.
  5. Selection, in advance, of a course of action or design modification for every foreseeable significant deviation of the observational findings from those predicted.
  6. Measurement of quantities and evaluation of actual conditions.
  7. Design modification per actual conditions

The observational method is suitable for construction that has already begun when an unexpected development occurs or when a failure or accident looms or has already happened. It is unsuitable for projects whose design cannot be altered during construction.[22]

See also

[edit]
  • Civil engineering
  • Deep Foundations Institute
  • Earthquake engineering
  • Earth structure
  • Effective stress
  • Engineering geology
  • Geological Engineering
  • Geoprofessions
  • Hydrogeology
  • International Society for Soil Mechanics and Geotechnical Engineering
  • Karl von Terzaghi
  • Land reclamation
  • Landfill
  • Mechanically stabilized earth
  • Offshore geotechnical engineering
  • Rock mass classifications
  • Sediment control
  • Seismology
  • Soil mechanics
  • Soil physics
  • Soil science


Notes

[edit]
  1. ^ a b c d Das, Braja (2006). Principles of Geotechnical Engineering. Thomson Learning.
  2. ^ a b Budhu, Muni (2007). Soil Mechanics and Foundations. John Wiley & Sons, Inc. ISBN 978-0-471-43117-6.
  3. ^ a b Disturbed soil properties and geotechnical design, Schofield, Andrew N., Thomas Telford, 2006. ISBN 0-7277-2982-9
  4. ^ Guerriero V., Mazzoli S. (2021). "Theory of Effective Stress in Soil and Rock and Implications for Fracturing Processes: A Review". Geosciences. 11 (3): 119. Bibcode:2021Geosc..11..119G. doi:10.3390/geosciences11030119.
  5. ^ Soil Mechanics, Lambe, T.William and Whitman, Robert V., Massachusetts Institute of Technology, John Wiley & Sons., 1969. ISBN 0-471-51192-7
  6. ^ Soil Behavior and Critical State Soil Mechanics, Wood, David Muir, Cambridge University Press, 1990. ISBN 0-521-33782-8
  7. ^ Terzaghi, K., Peck, R.B. and Mesri, G. (1996), Soil Mechanics in Engineering Practice 3rd Ed., John Wiley & Sons, Inc. ISBN 0-471-08658-4
  8. ^ Holtz, R. and Kovacs, W. (1981), An Introduction to Geotechnical Engineering, Prentice-Hall, Inc. ISBN 0-13-484394-0
  9. ^ Deep Scan Tech (2023): Deep Scan Tech uncovers hidden structures at the site of Denmark's tallest building.
  10. ^ "Geofrost Coring". GEOFROST. Retrieved 20 November 2020.
  11. ^ a b Han, Jie (2015). Principles and Practice of Ground Improvement. Wiley. ISBN 9781118421307.
  12. ^ RAJU, V. R. (2010). Ground Improvement Technologies and Case Histories. Singapore: Research Publishing Services. p. 809. ISBN 978-981-08-3124-0. Ground Improvement – Principles And Applications In Asia.
  13. ^ Pariseau, William G. (2011). Design analysis in rock mechanics. CRC Press.
  14. ^ Hegde, A.M. and Palsule P.S. (2020), Performance of Geosynthetics Reinforced Subgrade Subjected to Repeated Vehicle Loads: Experimental and Numerical Studies. Front. Built Environ. 6:15. https://www.frontiersin.org/articles/10.3389/fbuil.2020.00015/full.
  15. ^ Koerner, Robert M. (2012). Designing with Geosynthetics (6th Edition, Vol. 1 ed.). Xlibris. ISBN 9781462882892.
  16. ^ a b Dean, E.T.R. (2010). Offshore Geotechnical Engineering – Principles and Practice. Thomas Telford, Reston, VA, 520 p.
  17. ^ Randolph, M. and Gourvenec, S., 2011. Offshore geotechnical engineering. Spon Press, N.Y., 550 p.
  18. ^ Das, B.M., 2010. Principles of geotechnical engineering. Cengage Learning, Stamford, 666 p.
  19. ^ Atkinson, J., 2007. The mechanics of soils and foundations. Taylor & Francis, N.Y., 442 p.
  20. ^ Floating Offshore Wind Turbines: Responses in a Sea state – Pareto Optimal Designs and Economic Assessment, P. Sclavounos et al., October 2007.
  21. ^ Nicholson, D, Tse, C and Penny, C. (1999). The Observational Method in ground engineering – principles and applications. Report 185, CIRIA, London.
  22. ^ a b c Peck, R.B (1969). Advantages and limitations of the observational method in applied soil mechanics, Geotechnique, 19, No. 1, pp. 171-187.

References

[edit]
  • Bates and Jackson, 1980, Glossary of Geology: American Geological Institute.
  • Krynine and Judd, 1957, Principles of Engineering Geology and Geotechnics: McGraw-Hill, New York.
  • Ventura, Pierfranco, 2019, Fondazioni, Volume 1, Modellazioni statiche e sismiche, Hoepli, Milano
[edit]
  • Worldwide Geotechnical Literature Database


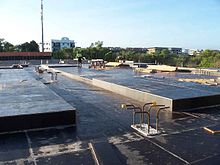
Suspended slab under construction, with the formwork still in place
Suspended slab formwork and rebar in place, ready for concrete pour.

A concrete slab is a common structural element of modern buildings, consisting of a flat, horizontal surface made of cast concrete. Steel-reinforced slabs, typically between 100 and 500 mm thick, are most often used to construct floors and ceilings, while thinner mud slabs may be used for exterior paving ( see below).[1][2]

In many domestic and industrial buildings, a thick concrete slab supported on foundations or directly on the subsoil, is used to construct the ground floor. These slabs are generally classified as ground-bearing or suspended. A slab is ground-bearing if it rests directly on the foundation, otherwise the slab is suspended.[3] For multi-story buildings, there are several common slab designs (

see § Design for more types):

  • Beam and block, also referred to as rib and block, is mostly used in residential and industrial applications. This slab type is made up of pre-stressed beams and hollow blocks and are temporarily propped until set, typically after 21 days.[4]
  • A hollow core slab which is precast and installed on site with a crane
  • In high rise buildings and skyscrapers, thinner, pre-cast concrete slabs are slung between the steel frames to form the floors and ceilings on each level. Cast in-situ slabs are used in high rise buildings and large shopping complexes as well as houses. These in-situ slabs are cast on site using shutters and reinforced steel.

On technical drawings, reinforced concrete slabs are often abbreviated to "r.c.c. slab" or simply "r.c.". Calculations and drawings are often done by structural engineers in CAD software.

Thermal performance

[edit]

Energy efficiency has become a primary concern for the construction of new buildings, and the prevalence of concrete slabs calls for careful consideration of its thermal properties in order to minimise wasted energy.[5] Concrete has similar thermal properties to masonry products, in that it has a relatively high thermal mass and is a good conductor of heat.

In some special cases, the thermal properties of concrete have been employed, for example as a heatsink in nuclear power plants or a thermal buffer in industrial freezers.[6]

Thermal conductivity

[edit]

Thermal conductivity of a concrete slab indicates the rate of heat transfer through the solid mass by conduction, usually in regard to heat transfer to or from the ground. The coefficient of thermal conductivity, k, is proportional to density of the concrete, among other factors.[5] The primary influences on conductivity are moisture content, type of aggregate, type of cement, constituent proportions, and temperature. These various factors complicate the theoretical evaluation of a k-value, since each component has a different conductivity when isolated, and the position and proportion of each components affects the overall conductivity. To simplify this, particles of aggregate may be considered to be suspended in the homogeneous cement. Campbell-Allen and Thorne (1963) derived a formula for the theoretical thermal conductivity of concrete.[6] In practice this formula is rarely applied, but remains relevant for theoretical use. Subsequently, Valore (1980) developed another formula in terms of overall density.[7] However, this study concerned hollow concrete blocks and its results are unverified for concrete slabs.

The actual value of k varies significantly in practice, and is usually between 0.8 and 2.0 W m−1 K−1.[8] This is relatively high when compared to other materials, for example the conductivity of wood may be as low as 0.04 W m−1 K−1. One way of mitigating the effects of thermal conduction is to introduce insulation (

see § Insulation).

Thermal mass

[edit]

The second consideration is the high thermal mass of concrete slabs, which applies similarly to walls and floors, or wherever concrete is used within the thermal envelope. Concrete has a relatively high thermal mass, meaning that it takes a long time to respond to changes in ambient temperature.[9] This is a disadvantage when rooms are heated intermittently and require a quick response, as it takes longer to warm the entire building, including the slab. However, the high thermal mass is an advantage in climates with large daily temperature swings, where the slab acts as a regulator, keeping the building cool by day and warm by night.

Typically concrete slabs perform better than implied by their R-value.[5] The R-value does not consider thermal mass, since it is tested under constant temperature conditions. Thus, when a concrete slab is subjected to fluctuating temperatures, it will respond more slowly to these changes and in many cases increase the efficiency of a building.[5] In reality, there are many factors which contribute to the effect of thermal mass, including the depth and composition of the slab, as well as other properties of the building such as orientation and windows.

Thermal mass is also related to thermal diffusivity, heat capacity and insulation. Concrete has low thermal diffusivity, high heat capacity, and its thermal mass is negatively affected by insulation (e.g. carpet).[5]

Insulation

[edit]

Without insulation, concrete slabs cast directly on the ground can cause a significant amount of extraneous energy transfer by conduction, resulting in either lost heat or unwanted heat. In modern construction, concrete slabs are usually cast above a layer of insulation such as expanded polystyrene, and the slab may contain underfloor heating pipes.[10] However, there are still uses for a slab that is not insulated, for example in outbuildings which are not heated or cooled to room temperature (

see § Mud slabs). In these cases, casting the slab directly onto a substrate of aggregate will maintain the slab near the temperature of the substrate throughout the year, and can prevent both freezing and overheating.

A common type of insulated slab is the beam and block system (mentioned above) which is modified by replacing concrete blocks with expanded polystyrene blocks.[11] This not only allows for better insulation but decreases the weight of slab which has a positive effect on load bearing walls and foundations.

Formwork set for concrete pour.
Concrete poured into formwork. This slab is ground-bearing and reinforced with steel rebar.

Design

[edit]

Ground-bearing slabs

[edit]

Ground-bearing slabs, also known as "on-ground" or "slab-on-grade", are commonly used for ground floors on domestic and some commercial applications. It is an economical and quick construction method for sites that have non-reactive soil and little slope.[12]

For ground-bearing slabs, it is important to design the slab around the type of soil, since some soils such as clay are too dynamic to support a slab consistently across its entire area. This results in cracking and deformation, potentially leading to structural failure of any members attached to the floor, such as wall studs.[12]

Levelling the site before pouring concrete is an important step, as sloping ground will cause the concrete to cure unevenly and will result in differential expansion. In some cases, a naturally sloping site may be levelled simply by removing soil from the uphill site. If a site has a more significant grade, it may be a candidate for the "cut and fill" method, where soil from the higher ground is removed, and the lower ground is built up with fill.[13]

In addition to filling the downhill side, this area of the slab may be supported on concrete piers which extend into the ground. In this case, the fill material is less important structurally as the dead weight of the slab is supported by the piers. However, the fill material is still necessary to support the curing concrete and its reinforcement.

There are two common methods of filling - controlled fill and rolled fill.[13]

  • Controlled fill: Fill material is compacted in several layers by a vibrating plate or roller. Sand fills areas up to around 800 mm deep, and clay may be used to fill areas up to 400 mm deep. However, clay is much more reactive than sand, so it should be used sparingly and carefully. Clay must be moist during compaction to homogenise it.[13]
  • Rolled fill: Fill is repeatedly compacted by an excavator, but this method of compaction is less effective than a vibrator or roller. Thus, the regulations on maximum depth are typically stricter.

Proper curing of ground-bearing concrete is necessary to obtain adequate strength. Since these slabs are inevitably poured on-site (rather than precast as some suspended slabs are), it can be difficult to control conditions to optimize the curing process. This is usually aided by a membrane, either plastic (temporary) or a liquid compound (permanent).[14]

Ground-bearing slabs are usually supplemented with some form of reinforcement, often steel rebar. However, in some cases such as concrete roads, it is acceptable to use an unreinforced slab if it is adequately engineered (

see below).

Suspended slabs

[edit]

For a suspended slab, there are a number of designs to improve the strength-to-weight ratio. In all cases the top surface remains flat, and the underside is modulated:

  • A corrugated slab is designed when the concrete is poured into a corrugated steel tray, more commonly called decking. This steel tray improves strength of the slab, and prevents the slab from bending under its own weight. The corrugations run in one direction only.
  • A ribbed slab gives considerably more strength in one direction. This is achieved with concrete beams bearing load between piers or columns, and thinner, integral ribs in the perpendicular direction. An analogy in carpentry would be a subfloor of bearers and joists. Ribbed slabs have higher load ratings than corrugated or flat slabs, but are inferior to waffle slabs.[15]
  • A waffle slab gives added strength in both directions using a matrix of recessed segments beneath the slab.[16] This is the same principle used in the ground-bearing version, the waffle slab foundation. Waffle slabs are usually deeper than ribbed slabs of equivalent strength, and are heavier hence require stronger foundations. However, they provide increased mechanical strength in two dimensions, a characteristic important for vibration resistance and soil movement.[17]
The exposed underside of a waffle slab used in a multi-storey building

Unreinforced slabs

[edit]

Unreinforced or "plain"[18] slabs are becoming rare and have limited practical applications, with one exception being the mud slab (

see below). They were once common in the US, but the economic value of reinforced ground-bearing slabs has become more appealing for many engineers.[10] Without reinforcement, the entire load on these slabs is supported by the strength of the concrete, which becomes a vital factor. As a result, any stress induced by a load, static or dynamic, must be within the limit of the concrete's flexural strength to prevent cracking.[19] Since unreinforced concrete is relatively very weak in tension, it is important to consider the effects of tensile stress caused by reactive soil, wind uplift, thermal expansion, and cracking.[20] One of the most common applications for unreinforced slabs is in concrete roads.

Mud slabs

[edit]

Mud slabs, also known as rat slabs, are thinner than the more common suspended or ground-bearing slabs (usually 50 to 150 mm), and usually contain no reinforcement.[21] This makes them economical and easy to install for temporary or low-usage purposes such as subfloors, crawlspaces, pathways, paving, and levelling surfaces.[22] In general, they may be used for any application which requires a flat, clean surface. This includes use as a base or "sub-slab" for a larger structural slab. On uneven or steep surfaces, this preparatory measure is necessary to provide a flat surface on which to install rebar and waterproofing membranes.[10] In this application, a mud slab also prevents the plastic bar chairs from sinking into soft topsoil which can cause spalling due to incomplete coverage of the steel. Sometimes a mud slab may be a substitute for coarse aggregate. Mud slabs typically have a moderately rough surface, finished with a float.[10]

Substrate and rebar prepared for pouring a mud slab

Axes of support

[edit]

One-way slabs

[edit]

A one-way slab has moment-resisting reinforcement only in its short axis, and is used when the moment in the long axis is negligible.[23] Such designs include corrugated slabs and ribbed slabs. Non-reinforced slabs may also be considered one-way if they are supported on only two opposite sides (i.e. they are supported in one axis). A one-way reinforced slab may be stronger than a two-way non-reinforced slab, depending on the type of load.

The calculation of reinforcement requirements for a one-way slab can be extremely tedious and time-consuming, and one can never be completely certain of the best design.[citation needed] Even minor changes to the project can necessitate recalculation of the reinforcement requirements. There are many factors to consider during the structural structure design of one-way slabs, including:

  • Load calculations
  • Bending moment calculation
  • Acceptable depth of flexure and deflection
  • Type and distribution of reinforcing steel

Two-way slabs

[edit]

A two-way slab has moment resisting reinforcement in both directions.[24] This may be implemented due to application requirements such as heavy loading, vibration resistance, clearance below the slab, or other factors. However, an important characteristic governing the requirement of a two-way slab is the ratio of the two horizontal lengths. If where is the short dimension and is the long dimension, then moment in both directions should be considered in design.[25] In other words, if the axial ratio is greater than two, a two-way slab is required.

A non-reinforced slab is two-way if it is supported in both horizontal axes.

Construction

[edit]

A concrete slab may be prefabricated (precast), or constructed on site.

Prefabricated

[edit]

Prefabricated concrete slabs are built in a factory and transported to the site, ready to be lowered into place between steel or concrete beams. They may be pre-stressed (in the factory), post-stressed (on site), or unstressed.[10] It is vital that the wall supporting structure is built to the correct dimensions, or the slabs may not fit.

On-site

[edit]

On-site concrete slabs are built on the building site using formwork, a type of boxing into which the wet concrete is poured. If the slab is to be reinforced, the rebars, or metal bars, are positioned within the formwork before the concrete is poured in.[26] Plastic-tipped metal or plastic bar chairs, are used to hold the rebar away from the bottom and sides of the form-work, so that when the concrete sets it completely envelops the reinforcement. This concept is known as concrete cover. For a ground-bearing slab, the formwork may consist only of side walls pushed into the ground. For a suspended slab, the formwork is shaped like a tray, often supported by a temporary scaffold until the concrete sets.

The formwork is commonly built from wooden planks and boards, plastic, or steel. On commercial building sites, plastic and steel are gaining popularity as they save labour.[27] On low-budget or small-scale jobs, for instance when laying a concrete garden path, wooden planks are very common. After the concrete has set the wood may be removed.

Formwork can also be permanent, and remain in situ post concrete pour. For large slabs or paths that are poured in sections, this permanent formwork can then also act as isolation joints within concrete slabs to reduce the potential for cracking due to concrete expansion or movement.

In some cases formwork is not necessary. For instance, a ground slab surrounded by dense soil, brick or block foundation walls, where the walls act as the sides of the tray and hardcore (rubble) acts as the base.

See also

[edit]
  • Shallow foundation (Commonly used for ground-bearing slabs)
  • Hollow-core slab (Voided slab, one-way spanning)
  • Beam and block (voided slab, one way spanning)
  • Voided biaxial slab (Voided slab, two-way spanning)
  • Formwork
  • Precast concrete
  • Reinforced concrete
  • Rebar
  • Concrete cover

References

[edit]
  1. ^ Garber, G. Design and Construction of Concrete Floors. 2nd ed. Amsterdam: Butterworth-Heinemann, 2006. 47. Print.
  2. ^ Duncan, Chester I. Soils and Foundations for Architects and Engineers. New York: Van Nostrand Reinhold, 1992. 299. Print.
  3. ^ "Ground slabs - Introduction". www.dlsweb.rmit.edu.au. Archived from the original on 2019-11-18. Retrieved 2017-12-07.
  4. ^ "What is a rib and block slab?". www.royalconcreteslabs.co.za. Royal concrete slabs.
  5. ^ a b c d e Cavanaugh, Kevin; et al. (2002). Guide to Thermal Properties of Concrete and Masonry Systems: Reported by ACI Committee 122. American Concrete Institute.
  6. ^ a b Campbell-Allen, D.; Thorne, C.P. (March 1963). "The thermal conductivity of concrete". Magazine of Concrete Research. 15 (43): 39–48. doi:10.1680/macr.1963.15.43.39. UDC 691.32.001:536.21:691.322.
  7. ^ Valore, R.C. Jr. (February 1980). "Calculation of U-values of Hollow Concrete Masonry". Concrete International. 2: 40–63.
  8. ^ Young, Hugh D. (1992). "Table 15.5". University Physics (7th ed.). Addison Wesley. ISBN 0201529815.
  9. ^ Sabnis, Gajanan M.; Juhl, William (2016). "Chapter 4: Sustainability through Thermal Mass of Concrete". Green Building with Concrete: Sustainable Design and Construction (2nd ed.). Taylor & Francis Group. ISBN 978-1-4987-0411-3.
  10. ^ a b c d e Garber, George (2006). Design and Construction of Concrete Floors (2nd ed.). Amsterdam: Butterworth-Heinemann. ISBN 978-0-7506-6656-5.
  11. ^ "What is a polystyrene concrete slab?". www.royalconcreteslabs.co.za. Royal concrete slabs.
  12. ^ a b McKinney, Arthur W.; et al. (2006). Design of Slabs-on-Ground: Reported by ACI Committee 360 (PDF). American Concrete Institute. Archived from the original (PDF) on 2021-05-08. Retrieved 2019-04-04.
  13. ^ a b c Staines, Allan (2014). The Australian House Building Manual. Pinedale Press. pp. 40–41. ISBN 978-1-875217-07-6.
  14. ^ "Concrete in Practice 11 - Curing In-Place Concrete" (PDF). Engineering.com. National Ready Mixed Concrete Association. Archived from the original (PDF) on 4 April 2019. Retrieved 4 April 2019.
  15. ^ "Ribbed Slabs Datasheet" (PDF). Kaset Kalip. Archived from the original (PDF) on 29 March 2018. Retrieved 4 April 2019.
  16. ^ "Ribbed and waffle slabs". www.concretecentre.com. Retrieved 2019-04-04.
  17. ^ Concrete Framed Buildings: A Guide to Design and Construction. MPA The Concrete Centre. 2016. ISBN 978-1-904818-40-3.
  18. ^ Garrison, Tim (19 February 2014). "Clearing the confusion on 'plain concrete'". Civil & Structural Engineer. Archived from the original on 8 May 2019. Retrieved 8 May 2019.
  19. ^ Walker, Wayne. "Reinforcement for slabs on ground". Concrete Construction. Retrieved 8 May 2019.
  20. ^ "Rupture depth of an unreinforced concrete slab on grade" (PDF). Aluminium Association of Florida, Inc. Archived from the original (PDF) on 2020-09-26. Retrieved 2019-05-08.
  21. ^ Arcoma, Peter. "What is a mud slab?". Builder-Questions.com. Retrieved 8 May 2019.
  22. ^ Postma, Mark; et al. "Floor Slabs". Whole Building Design Guide. National Institute of Building Sciences. Retrieved 8 May 2019.
  23. ^ Gilbert, R. I. (1980). UNICIV Report 211 (PDF). University of New South Wales.
  24. ^ Prieto-Portar, L. A. (2008). EGN-5439 The Design of Tall Buildings; Lecture #14: The Design of Reinforced Concrete Slabs (PDF). Archived from the original (PDF) on 2017-08-29. Retrieved 2019-04-04.
  25. ^ "What is the difference between one way and two way slab?". Basic Civil Engineering. 16 June 2019. Retrieved 8 July 2019.
  26. ^ Concrete Basics: A Guide to Concrete Practice (6th ed.). Cement Concrete & Aggregates Australia. 2004. p. 53.
  27. ^ Nemati, Kamran M. (2005). "Temporary Structures: Formwork for Concrete" (PDF). Tokyo Institute of Technology. Archived from the original (PDF) on 12 July 2018. Retrieved 4 April 2019.
[edit]
  • Concrete Basics: A Guide to Concrete Practice
  • Super Insulated Slab Foundations
  • Design of Slabs on Ground Archived 2021-05-08 at the Wayback Machine


Photo
Photo
Photo
Photo

Reviews for


Jeffery James

(5)

Very happy with my experience. They were prompt and followed through, and very helpful in fixing the crack in my foundation.

Sarah McNeily

(5)

USS was excellent. They are honest, straightforward, trustworthy, and conscientious. They thoughtfully removed the flowers and flower bulbs to dig where they needed in the yard, replanted said flowers and spread the extra dirt to fill in an area of the yard. We've had other services from different companies and our yard was really a mess after. They kept the job site meticulously clean. The crew was on time and friendly. I'd recommend them any day! Thanks to Jessie and crew.

Jim de Leon

(5)

It was a pleasure to work with Rick and his crew. From the beginning, Rick listened to my concerns and what I wished to accomplish. Out of the 6 contractors that quoted the project, Rick seemed the MOST willing to accommodate my wishes. His pricing was definitely more than fair as well. I had 10 push piers installed to stabilize and lift an addition of my house. The project commenced at the date that Rick had disclosed initially and it was completed within the same time period expected (based on Rick's original assessment). The crew was well informed, courteous, and hard working. They were not loud (even while equipment was being utilized) and were well spoken. My neighbors were very impressed on how polite they were when they entered / exited my property (saying hello or good morning each day when they crossed paths). You can tell they care about the customer concerns. They ensured that the property would be put back as clean as possible by placing MANY sheets of plywood down prior to excavating. They compacted the dirt back in the holes extremely well to avoid large stock piles of soils. All the while, the main office was calling me to discuss updates and expectations of completion. They provided waivers of lien, certificates of insurance, properly acquired permits, and JULIE locates. From a construction background, I can tell you that I did not see any flaws in the way they operated and this an extremely professional company. The pictures attached show the push piers added to the foundation (pictures 1, 2 & 3), the amount of excavation (picture 4), and the restoration after dirt was placed back in the pits and compacted (pictures 5, 6 & 7). Please notice that they also sealed two large cracks and steel plated these cracks from expanding further (which you can see under my sliding glass door). I, as well as my wife, are extremely happy that we chose United Structural Systems for our contractor. I would happily tell any of my friends and family to use this contractor should the opportunity arise!

Chris Abplanalp

(5)

USS did an amazing job on my underpinning on my house, they were also very courteous to the proximity of my property line next to my neighbor. They kept things in order with all the dirt/mud they had to excavate. They were done exactly in the timeframe they indicated, and the contract was very details oriented with drawings of what would be done. Only thing that would have been nice, is they left my concrete a little muddy with boot prints but again, all-in-all a great job

Dave Kari

(5)

What a fantastic experience! Owner Rick Thomas is a trustworthy professional. Nick and the crew are hard working, knowledgeable and experienced. I interviewed every company in the area, big and small. A homeowner never wants to hear that they have foundation issues. Out of every company, I trusted USS the most, and it paid off in the end. Highly recommend.

View GBP