Solving MacBook Hardware Problems: A Comprehensive Troubleshooting Guide

Introduction

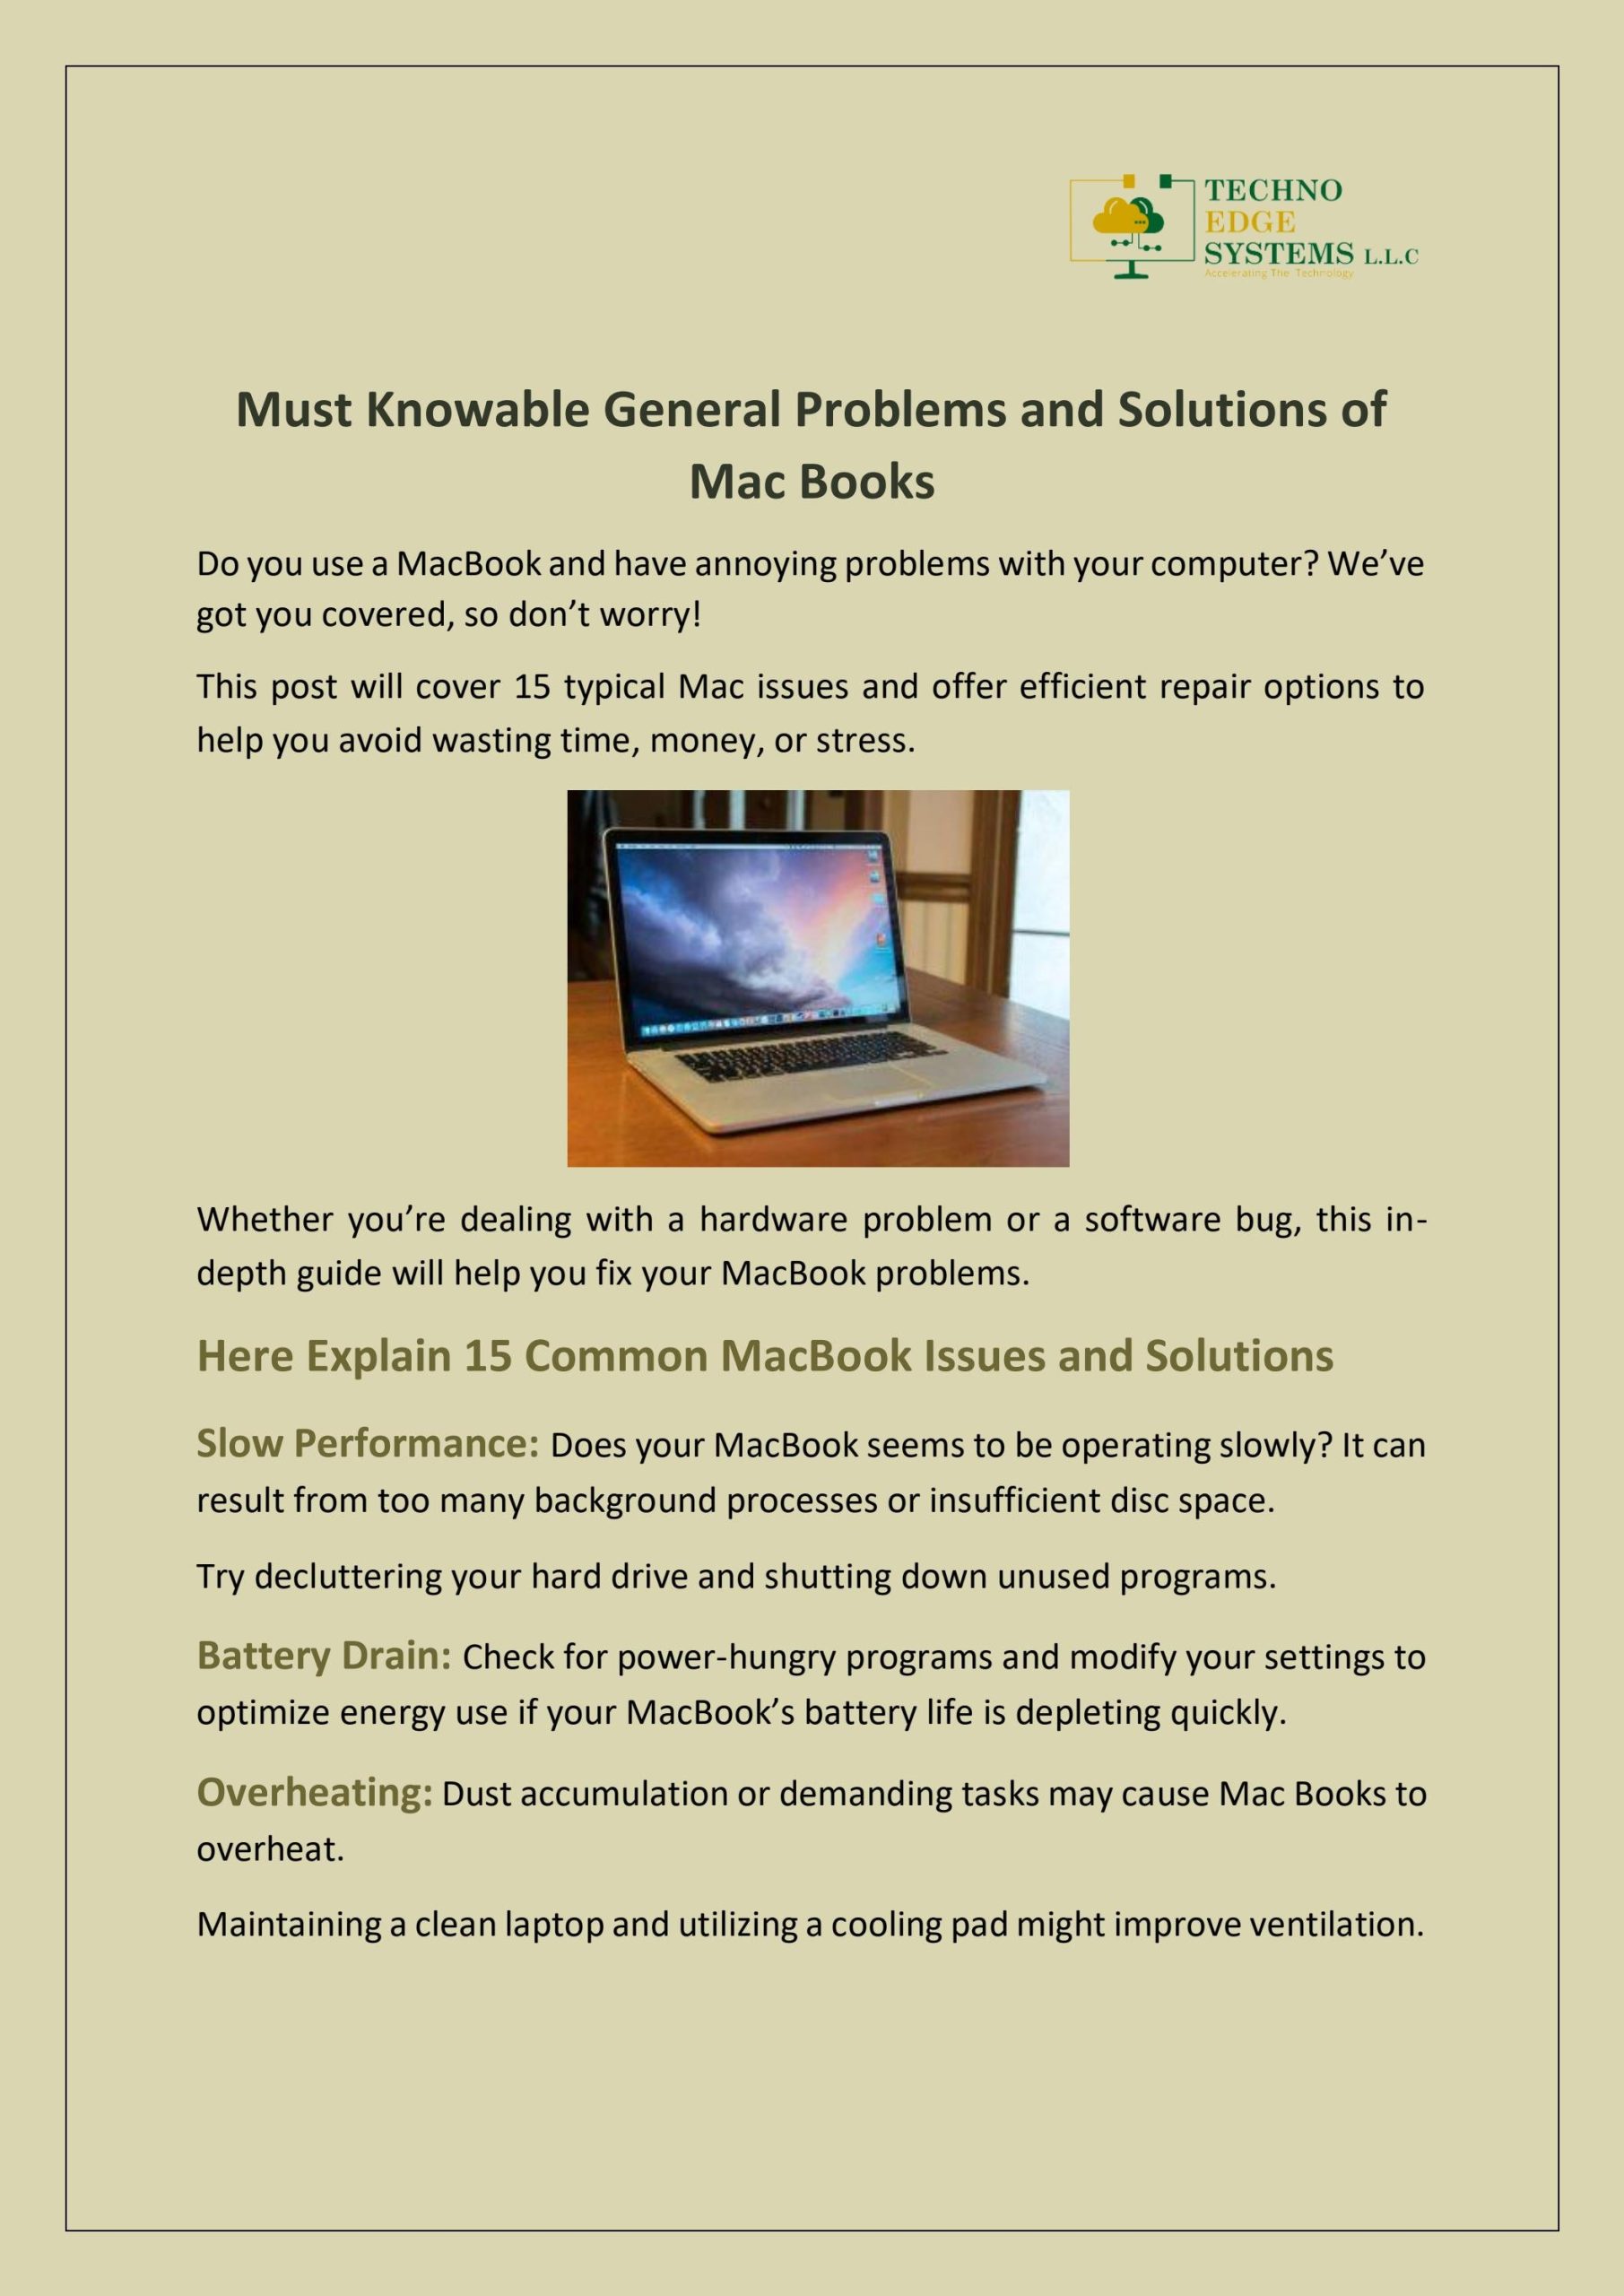
Are you experiencing hardware issues with your MacBook? Don’t worry, we’ve got you covered! In this comprehensive troubleshooting guide, we will walk you through common MacBook hardware problems and provide step-by-step solutions to help you resolve them. Whether you’re dealing with a malfunctioning keyboard, a faulty trackpad, or any other hardware-related issue, this guide will assist you in diagnosing and fixing the problem. So, let’s dive in and get your MacBook back in top shape!

1. MacBook Won’t Turn On

If your MacBook fails to turn on, try these troubleshooting steps:

1.1 Check the Power Connection

Ensure that your MacBook is properly connected to a power source. Check the power adapter, cable, and the power outlet. If necessary, try a different power outlet or use a different power adapter.

1.2 Reset the SMC

Resetting the System Management Controller (SMC) can often resolve power-related issues. To do this, follow these steps:

  1. Shut down your MacBook.
  2. Press and hold the Shift + Control + Option keys along with the power button for about 10 seconds.
  3. Release all the keys and power button.
  4. Press the power button to turn on your MacBook.

2. Overheating MacBook

If your MacBook is overheating, follow these steps to resolve the issue:

2.1 Check for Dust and Debris

Dust and debris can accumulate in the cooling system, leading to overheating. Use compressed air or a soft brush to clean the vents and fans of your MacBook. Ensure that the airflow is not obstructed.

2.2 Close Resource-Intensive Applications

Resource-intensive applications can cause your MacBook to overheat. Close any unnecessary applications and check if the temperature decreases.

3. Unresponsive Keyboard or Trackpad

If your MacBook’s keyboard or trackpad is unresponsive, try these troubleshooting steps:

3.1 Restart Your MacBook

Restarting your MacBook can often resolve minor software glitches affecting the keyboard or trackpad. Click on the Apple menu and select “”Restart.””

Summary

This troubleshooting guide is designed to help MacBook users tackle various hardware problems they may encounter. It provides detailed instructions and solutions for resolving common issues such as keyboard malfunctions, trackpad problems, and more. By following the step-by-step troubleshooting methods outlined in this guide, you can save time and money by fixing the problems yourself. So, if you’re facing any hardware-related issues with your MacBook, this guide will serve as your go-to resource for finding solutions and getting your devi his response ce back to optimal performance.

Image

Q: How do I reset the SMC on my MacBook?
A: To reset the System Management Controller (SMC) on your MacBook, shut it down, then press and hold the power button for 10 seconds. Release the button, wait a few seconds, and then turn on your MacBook.
Q: My MacBook is not turning on. What should I do?
A: First, make sure your MacBook is connected to a power source. If it is, try resetting the SMC by following the steps mentioned above. If the issue persists, it is recommended to contact Apple Support or visit an authorized service provider.
Q: How can I check if my MacBook’s battery needs to be replaced?
A: Click on the Apple menu, go to “About This Mac,” then click on “System Report.” Under the “Hardware” section, select “Power” and look for the “Cycle Count” value. If it exceeds the recommended limit for your MacBook model, it may be time to replace the battery.
Q: My MacBook is running slow. What can I do to improve its performance?
A: There are several steps you can take to improve your MacBook’s performance. These include closing unnecessary applications, deleting unused files, restarting your MacBook, updating macOS, and checking for resource-intensive processes using the Activity Monitor.
Q: How do I clean the keyboard of my MacBook?
A: Start by shutting down your MacBook. Then, using a can of compressed air, gently blow away any debris or dust from the keyboard. You can also use a soft, lint-free cloth lightly moistened with water to clean the keys. Avoid using excessive moisture or cleaning solutions.

MacBook Performance Troubleshooting: Speeding Up Your Machine

Introduction

Are you experiencing sluggish performance on your MacBook? Is your once lightning-fast machine now taking forever to load applications and complete tasks? If so, don’t worry, you’re not alone. Over time, MacBooks can become slower due to various reasons such as accumulated junk files, outdated software, or insufficient hardware resources. However, there are several troubleshooting steps you can take to speed up your MacBook and restore its optimal performance. In this blog post, we will explore some effective techniques to help you diagnose and resolve performance issues on your MacBook.

1. Clearing Cache and Temporary Files

One of the first steps to improve your MacBook’s performance is to clear cache and temporary files. These files can accumulate over time and slow down your machine. To do this:

  • Open Finder and click on “”Go”” in the menu bar.
  • Select “”Go to Folder”” and type in “”~/Library/Caches””.
  • Delete the contents of the “”Caches”” folder.
  • Repeat the same process for “”~/Library/Logs”” and “”~/Library/Preferences”” folders.

2. Managing Startup Items

Having too many startup items can significantly impact your MacBook’s performance. To manage startup items:

  • Go to “”System Preferences”” and click on “”Users & Groups””.
  • Select your username and click on the “”Login Items”” tab.
  • Remove any unnecessary applications from the list.

3. Updating macOS

Keeping your macOS up to date is crucial for optimal performance. To update your macOS:

  • Click on the Apple menu and select “”System Preferences””.
  • Choose “”Software Update”” and install any available updates.

4. Managing Storage Space

Running out of storage space can slow down your MacBook. Here’s how you can manage your storage:

  • Click on the Apple menu and select “”About This Mac””.
  • Go to the “”Storage”” tab and click on “”Manage””.
  • Review the recommendations and remove any unnecessary files or applications.

5. Optimizing Energy Settings

Image

Adjusting your energy settings can help improve your MacBook’s performance. Follow these steps:

  • Go to “”System Preferences”” and select “”Energy Saver””.
  • Enable “”Automatic graphics switching”” if available.
  • Adjust the “”Turn display off after.

Summary

In this blog post, we have discussed various troubleshooting techniques to improve the performance of your MacBook. We started by highlighting the common reasons behind a slow MacBook, such as excessive junk files, outdated software, and hardware limitations. We then explored different steps you can take to address these issues.

Firstly, we discussed the importance of decluttering your MacBook by removing unnecessary files, applications, and widgets. This helps free up valuable storage space and reduces the burden on your system. We also emphasized the significance of regularly updating your macOS and applications to ensure compatibility and take advantage of performance enhancements.

Furthermore, we delved into optimizing your MacBook’s startup items and managing resource-intensive processes. By disabling unnecessary startup items and monitoring resource usage, you can prevent unnecessary strain on your system and improve overall performance.

Lastly, we touched upon the benefits of upgrading your MacBook’s hardware components, such as increasing RAM or replacing the hard drive with a solid-state drive (SSD). These hardware upgrades can significantly boost your MacBook’s speed and responsiveness.

By following these troubleshooting techniques, you can effectively diagnose and resolve performance issues on your MacBook, ultimately restoring its speed Read Full Article and efficiency. Remember, maintaining a clean and optimized system is key to enjoying a seamless and productive user experience on your MacBook.

Q: How can I speed up my MacBook’s performance?
A: There are several ways to improve your MacBook’s performance. You can start by closing unnecessary applications and processes, updating your operating system and applications, clearing out temporary files and caches, managing your startup items, and optimizing your storage space.
Q: Why is my MacBook running slow?
A: There could be various reasons for a slow MacBook. It could be due to insufficient RAM, a full hard drive, outdated software, too many startup items, or even malware. Identifying the specific cause can help in troubleshooting and resolving the issue.
Q: How can I check the available storage space on my MacBook?
A: To check the available storage space on your MacBook, click on the Apple menu in the top-left corner, select “About This Mac,” and then go to the “Storage” tab. It will display a breakdown of your storage usage and available space.
Q: Should I upgrade my MacBook’s RAM?
A: Upgrading your MacBook’s RAM can significantly improve its performance, especially if you frequently use memory-intensive applications or multitask heavily. Consider upgrading if you often experience slowdowns and your current RAM usage is consistently high.
Q: How can I optimize my MacBook’s startup items?
A: To optimize your MacBook’s startup items, go to “System Preferences,” select “Users & Groups,” click on your username, and then navigate to the “Login Items” tab. From there, you can remove unnecessary applications or processes that launch at startup, which can help speed up the booting process.

Troubleshooting Guide: Dealing with MacBook Overheating Issues

Introduction

MacBooks are known for their sleek design and powerful performance, but they can sometimes suffer from overheating issues. When your MacBook gets too hot, it can lead to decreased performance, unexpected shutdowns, and even permanent damage to the internal components. In this troubleshooting guide, we will explore the common causes of MacBook overheating and provide practical solutions to help you keep your device cool and running smoothly.

1. Check for Dust and Debris

Dust and debris can accumulate over time and clog the ventilation system of your MacBook, leading to overheating. Use a soft brush or compressed air to clean the vents and remove any obstructions. Regular cleaning can significantly improve airflow and prevent overheating.

2. Avoid Using MacBook on Soft Surfaces

Using your MacBook on soft surfaces like beds, pillows, or blankets can obstruct the airflow and cause overheating. Always place your MacBook on a hard, flat surface such as a desk or table to ensure proper ventilation.

3. Close Unnecessary Applications

Running multiple applications simultaneously can put a strain on your MacBook’s processor, leading to overheating. Close any unnecessary applications and only keep the ones you need for your current task. This will help reduce the workload on your MacBook and prevent overheating.

4. Update macOS and Applications

Outdated software can sometimes cause compatibility issues and result in overheating. Regularly check for updates for both macOS and your applications. Keeping your software up to date ensures optimal performance and can help resolve any overheating problems.

5. Adjust Energy Saver Settings

MacBooks have built-in energy saver settings that can help regulate power usage and prevent overheating. Go to System Preferences > Energy Saver and adjust the settings to optimize power consumption. Lowering the display brightness and reducing the time before the display turns off can help keep your MacBook cool.

6. Use Cooling Pads or External Fans

If you frequently use your MacBook for resource-intensive tasks like gaming or video editing, consider using cooling pads or external fans. These accessories help improve airflow and dissipate heat, keeping your MacBook cool even during demanding tasks.

Summary

MacBook overheating is a common problem that many users encounter. It can be caused by various factors, including heavy usage, inadequate ventilation, software issues, or hardware problems. To address this issue, it is important to first identify the root cause. This troubleshooting guide will walk you through the steps to diagnose and resolve MacBook overheating problems.

The guide will cover topics such as:

  • Checking for software updates and optimizing system settings
  • Cleaning the MacBook’s vents and fans
  • Using cooling pads or external fans
  • Monitoring CPU usage and managing resource-intensive applications
  • Inspecting and replacing faulty hardware components

By following the troubleshooting st click for info eps outlined in this guide, you can effectively address MacBook overheating issues and ensure optimal performance and longevity for your device.

Q: Why is my MacBook overheating?
A: There can be several reasons for MacBook overheating, such as running resource-intensive applications, dust accumulation in the vents, or a faulty cooling system.
Q: How can I prevent my MacBook from overheating?
A: To prevent overheating, make sure to keep your MacBook on a hard and flat surface, avoid using it on soft surfaces like beds or couches. Additionally, regularly clean the vents and fans to remove dust buildup.
Q: What should I do if my MacBook is overheating?
A: If your MacBook is overheating, try closing any unnecessary applications and processes to reduce the workload on the system. You can also adjust the energy-saving settings to lower the performance and temperature. If the issue persists, consider contacting Apple Support for further assistance.
Q: Can using resource-intensive applications cause overheating?
A: Yes, running applications that require a lot of processing power can cause your MacBook to heat up. It is recommended to close any unnecessary applications or tasks to reduce the strain on the system.
Q: Is it normal for my MacBook to get warm during use?
A: Yes, it is normal for a MacBook to get warm during intensive tasks or prolonged use. However, if it becomes excessively hot or starts to throttle performance, it may indicate an overheating issue.
Q: How often should I clean the vents and fans of my MacBook?
A: It is recommended to clean the vents and fans of your MacBook at least once every few months to prevent dust buildup and ensure proper airflow for cooling.

Resolving Common MacBook Software Glitches: A Step-by-Step Guide

Introduction

Are you a MacBook user who frequently encounters software glitches? Don’t worry, you’re not alone! Many MacBook users face various software issues that can be frustrating and disruptive to their workflow. In this step-by-step guide, we will walk you through some common MacBook software glitches and provide you with easy-to-follow solutions to resolve them. Whether you’re experiencing freezing apps, slow performance, or unexpected crashes, this guide will help you troubleshoot and fix these issues, allowing you to get back to using your MacBook smoothly and efficiently.

Frozen or Unresponsive Applications

Image

When your MacBook applications freeze or become unresponsive, it can be frustrating. Here’s how you can tackle this issue:

Force Quit the Application

If an application becomes unresponsive, you can force quit it by following these steps:

  1. Press Command + Option + Esc simultaneously.
  2. A “”Force Quit Applications”” window will appear.
  3. Select the unresponsive application and click “”Force Quit.””

Restart Your MacBook

If force quitting doesn’t work, you can try restarting your MacBook. Follow these steps:

  1. Click on the Apple menu in the top-left corner of your screen.
  2. Select “”Restart”” from the drop-down menu.
  3. Wait for your MacBook to restart and check if the application is working properly.

Slow Performance

Is your MacBook running slower than usual? Here are some steps to improve its performance:

Clear Cache and Temporary Files

Over time, cache and temporary files can accumulate and slow down your MacBook. Follow these steps to clear them:

  1. Open Finder and click on “”Go”” in the menu bar.
  2. Select “”Go to Folder”” from the drop-down menu.
  3. Type “”~/Library/Caches”” and press Enter.
  4. Delete the contents of the “”Caches”” folder.
  5. Repeat the above steps for “”~/Library/Logs”” and “”~/Library/Preferences”” folders.

Summary

MacBooks are known for their reliability and performance, but like any other computer, they can encounter software glitches from time to time. This guide aims to assist MacBook users in resolving common software issues that may arise. By following the step-by-step instructions provided, you will be able to troubleshoot and fix freezing apps, slow performance, unexpected crashes, and other glitches that may hinder your productivity. With these solutions company website at your disposal, you can ensure that your MacBook runs smoothly and efficiently, allowing you to focus on your tasks without any interruptions.

  1. Q: How do I force quit an unresponsive application on my MacBook?
    A: Press the Command + Option + Escape keys simultaneously to open the Force Quit Applications window. Select the unresponsive application and click “Force Quit.”
  2. Q: How can I reset the SMC (System Management Controller) on my MacBook?
    A: Shut down your MacBook. Press and hold the Shift + Control + Option keys along with the power button for about 10 seconds. Release all keys, then press the power button to turn on your MacBook.
  3. Q: What should I do if my MacBook freezes and becomes unresponsive?
    A: Hold down the power button for about 10 seconds until your MacBook shuts down. Wait a few seconds, then press the power button to turn it back on.
  4. Q: How can I reset the NVRAM (Non-Volatile Random-Access Memory) on my MacBook?
    A: Shut down your MacBook. Press the power button, then immediately hold down the Command + Option + P + R keys. Keep holding the keys until you hear the startup sound for the second time, then release them.
  5. Q: What should I do if my MacBook’s battery drains quickly?
    A: Go to the Apple menu, select “System Preferences,” then choose “Energy Saver.” Adjust the settings to optimize battery life, such as reducing the display brightness or shortening the sleep timer.

MacBook Battery Drain: Troubleshooting and Solutions

Introduction

Are you experiencing unexpected battery drain on your MacBook? It can be frustrating when your laptop’s battery life doesn’t last as long as it used to. In this blog post, we will explore common causes of MacBook battery drain and provide you with troubleshooting tips and solutions to help you maximize your battery life.

1. Check Battery Usage

The first step in troubleshooting MacBook battery drain is to identify which apps or processes are consuming the most power. To do this, click on the battery icon in the menu bar and select “”Open Energy Saver Preferences.”” Here, you will find a breakdown of battery usage by app. Close any unnecessary apps or processes that are draining your battery excessively.

2. Update macOS

Image

Outdated software can often lead to battery drain issues. Ensure that your MacBook is running the latest version of macOS by going to the Apple menu, selecting “”System Preferences,”” and clicking on “”Software Update.”” Install any available updates to optimize battery performance and fix any known bugs or issues.

3. Adjust Display Brightness

The brightness level of your MacBook’s display can significantly impact battery life. Lowering the brightness can help conserve power. You can adjust the brightness by pressing the F1 and F2 keys on your keyboard or by going to “”System Preferences”” and selecting “”Displays.”” Consider enabling the “”Automatically adjust brightness”” option to allow your MacBook to adjust the brightness based on ambient lighting conditions.

4. Manage Background Processes

Background processes and apps running in the background can drain your MacBook’s battery without you even realizing it. To manage these processes, go to “”System Preferences”” and select “”Users & Groups.”” Click on your username, go to the “”Login Items”” tab, and remove any unnecessary apps that launch at startup. Additionally, check the “”Activity Monitor”” (found in the Utilities folder) to identify and close any resource-intensive processes.

5. Optimize Energy Saver Settings

MacBooks come with built-in energy-saving features that can help extend battery life. Go to “”System Preferences”” and select “”Energy Saver.”” Adjust the settings to.

Summary

If you’re facing battery drain issues on your MacBook, don’t worry! There are several potential causes and solutions to help you resolve this problem. In this blog post, we will cover various troubleshooting steps, including checking for resource-intensive applications, adjusting power settings, resetting the System Management Controller (SMC), and more. By following these tips, you Learn More Here can optimize your MacBook’s battery life and ensure it lasts longer between charges. Let’s dive in and get your MacBook’s battery back on track!

Q: Why is my MacBook battery draining quickly?
A: There could be several reasons for this, such as running power-hungry applications, enabling unnecessary features, or having a faulty battery.
Q: How can I check which applications are consuming the most battery?
A: Go to the Apple menu, click on “About This Mac,” then select “System Report.” Under the “Hardware” section, click on “Power” and check the “Battery Information” to see the applications using significant energy.
Q: What can I do to optimize my MacBook’s battery life?
A: You can try adjusting the display brightness, disabling unnecessary notifications, closing unused applications, and keeping your MacBook’s software up to date.
Q: How do I calibrate my MacBook battery?
A: Start by charging your MacBook to 100%, then use it until the battery drains completely and your MacBook shuts down. Leave it off for about 5 hours, then charge it back to 100% without interruption.
Q: Is it normal for the battery health to decrease over time?
A: Yes, it is normal for the battery health to degrade gradually over time and with usage. However, if you notice a sudden and significant decrease, it might indicate a problem.
Q: How can I extend the lifespan of my MacBook battery?
A: Avoid exposing your MacBook to extreme temperatures, regularly update your software, and avoid keeping your MacBook plugged in all the time. It’s also recommended to perform battery calibration occasionally.
Q: Should I keep my MacBook plugged in all the time?
A: It is not recommended to keep your MacBook plugged in all the time as it can affect the battery’s lifespan. It’s better to use and charge the battery regularly to keep it healthy.
Q: Can a faulty charger cause battery drain?
A: Yes, a faulty charger can cause battery drain. Make sure to use an original or certified charger for your MacBook to avoid any potential issues.

Your Guide to Troubleshooting MacBook Connectivity Issues

Introduction

Are you experiencing connectivity issues with your MacBook? Don’t worry, you’re not alone. Many MacBook users encounter problems with Wi-Fi, Bluetooth, or other network connections at some point. These issues can be frustrating, but with the right troubleshooting steps, you can often resolve them on your own. In this guide, we will walk you through common MacBook connectivity problems and provide you with practical solutions to get your device back online.

1. Check Wi-Fi Connection

If you’re facing Wi-Fi connectivity problems, start by checking your Wi-Fi connection. Ensure that your MacBook is within range of the Wi-Fi network and that the network is functioning properly. Restart your router and try connecting to a different Wi-Fi network to determine if the issue is specific to your MacBook or the network itself.

2. Update macOS

Image

Outdated software can often cause connectivity issues. Make sure your MacBook is running the latest version of macOS. If you’ve tried these solutions and are still encountering issues, consider reaching out to a Digicomp MacBook repair technician. They can provide professional insight and troubleshooting to resolve your connectivity challenges. To check for updates, go to the Apple menu, select “System Preferences,” and click on “Software Update.” Install any available updates to ensure your MacBook has the latest bug fixes and improvements.

3. Reset Network Settings

If you’re still experiencing connectivity problems, resetting your network settings can help. Go to “”System Preferences”” and select “”Network.”” Click on the “”Advanced”” button and choose “”Reset Wi-Fi”” or “”Reset Network Settings.”” This will clear any saved network configurations and allow you to start fresh.

4. Check Bluetooth Connectivity

If you’re having trouble connecting Bluetooth devices to your MacBook, start by checking if Bluetooth is enabled. Go to “”System Preferences”” and click on “”Bluetooth.”” Ensure that the Bluetooth option is turned on. If the issue persists, try removing the device from your MacBook’s Bluetooth settings and reconnecting it.

5. Remove and Re-add Wi-Fi Network

If you’re unable to connect to a specific Wi-Fi network, removing and re-adding it can often resolve the issue. Go to “”System Preferences”” and select “”Network.”” Click on the Wi-Fi connection you’re having trouble with and click on the “”-“” button to remove it. Then, click on the “”+”” button to add the network again and enter the necessary details.

Summary

Having trouble with your MacBook’s connectivity can disrupt your work, entertainment, and overall productivity. This guide aims to help you troubleshoot and resolve common connectivity issues that MacBook users often face. Whether it’s a Wi-Fi problem, Bluetooth connection failure, or any other network-related issue, we’ve got you covered.

By following the troubleshooting steps outlined in this guide, you’ll be able to identify the root cause of the problem and implement the necessary solutions. From checking your network settings to resetting network configurations, we’ll provide you with clear instructions and tips to get your MacBook back online.

Stay tuned for our upcoming blog posts where we will dive deeper into specific connectivity issues and their trou Discover More Here bleshooting methods. With our guide, you’ll be able to overcome MacBook connectivity problems and enjoy a seamless online experience once again.

Q: How do I troubleshoot Wi-Fi connectivity issues on my MacBook?
A: First, make sure Wi-Fi is enabled on your MacBook by going to the Wi-Fi menu in the menu bar. Then, try restarting your Wi-Fi router and MacBook. If the issue persists, try forgetting the Wi-Fi network and reconnecting to it. You can also try resetting the network settings on your MacBook.
Q: My MacBook is not connecting to Bluetooth devices. What should I do?
A: Start by checking if Bluetooth is turned on in the Bluetooth menu in the menu bar. Ensure that the device you want to connect to is in pairing mode. If the issue persists, try resetting the Bluetooth module on your MacBook by going to System Preferences > Bluetooth and clicking on “Reset the Bluetooth module.”
Q: How can I troubleshoot Ethernet connectivity issues on my MacBook?
A: First, check if the Ethernet cable is securely plugged into both your MacBook and the router. Try using a different Ethernet cable or port on the router if possible. You can also try resetting the network settings on your MacBook or restarting the router. If none of these steps work, there may be an issue with the Ethernet port on your MacBook.
Q: My MacBook is not recognizing external displays. What should I do?
A: Ensure that the display is properly connected to your MacBook and turned on. Go to System Preferences > Displays and check if the external display is detected. If not, try resetting the NVRAM on your MacBook by restarting it and holding down Command + Option + P + R keys until you hear the startup sound twice. If the issue persists, there may be a compatibility problem between your MacBook and the external display.
Q: How can I troubleshoot issues with USB devices not working on my MacBook?
A: Start by checking if the USB device is properly connected to your MacBook. Try using a different USB port or cable if available. Make sure the USB device is compatible with your MacBook. You can also try resetting the SMC (System Management Controller) on your MacBook. If none of these steps work, there may be an issue with the USB port on your MacBook.

Troubleshooting Common MacBook Startup Problems

Introduction

Having trouble starting up your MacBook? Don’t worry, you’re not alone. Many MacBook users encounter startup problems at some point, but fortunately, most of these issues can be resolved with a few troubleshooting steps. In this blog post, we will guide you through some common MacBook startup problems and provide you with effective solutions to get your MacBook up and running again.

1. MacBook Not Turning On

If your MacBook is not turning on, there could be several reasons behind it. Start by checking if the battery is charged or connected properly. If the battery is fine, try resetting the System Management Controller (SMC) by following these steps:

  1. Shut down your MacBook.
  2. Press and hold the Shift + Control + Option keys along with the power button for about 10 seconds.
  3. Release all the keys and press the power button to turn on your MacBook.

2. Gray Screen on Startup

If your MacBook gets stuck on a gray screen during startup, it could indicate a software or hardware issue. Try these troubleshooting steps:

  1. Disconnect all external devices and restart your MacBook.
  2. If the gray screen persists, boot your MacBook in Safe Mode by holding the Shift key while starting up.
  3. If the problem still persists, try resetting the NVRAM (non-volatile random-access memory) by restarting your MacBook and holding Command + Option + P + R keys until you hear the startup sound for the second time.

3. MacBook Freezing on Startup

If your MacBook freezes during startup, it could be due to incompatible software or insufficient disk space. Follow these steps to troubleshoot the issue:

  1. Boot your MacBook in Safe Mode by holding the Shift key while starting up.
  2. If your MacBook starts up fine in Safe Mode, it indicates that incompatible software is causing the issue. Uninstall recently installed applications or extensions.
  3. If the problem persists, check your available disk space. Delete unnecessary files or move them to an external storage device to free up space.

4. MacBook Restarting in a Loop

Image

If your MacBook keeps restarting in a loop without fully booting up, try the following troubleshooting steps:

  1. Disconnect all external devices and restart your MacBook.
  2. If the issue persists, boot your MacBook in Safe Mode by holding the Shift key while starting up.

Summary

Encountering startup problems with your MacBook can be frustrating, but with the right troubleshooting techniques, you can quickly resolve most issues. In this blog post, we have discussed some common MacBook startup problems and provided step-by-step solutions to help you troubleshoot and fix them. Whether you are facing a black screen, a frozen startup, or a flashing question mark folder, we have covered it all. By following the troubleshooting steps outlined in this post, you can save time and money by resolving these issues on your own, without the need for webpage professional assistance. So, if you’re currently facing any MacBook startup problems, read on and get ready to bring your MacBook back to life!

Q: My MacBook is not turning on. What should I do?
A: First, make sure your MacBook is connected to a power source. If it is connected and still not turning on, try resetting the SMC (System Management Controller) by following these steps:

  1. Shut down your MacBook.
  2. Press and hold the Shift + Control + Option keys along with the power button for about 10 seconds.
  3. Release all the keys and then press the power button to turn on your MacBook.

If the issue persists, it is recommended to contact Apple Support for further assistance.

Q: My MacBook gets stuck on the Apple logo during startup. How can I fix this?
A: Start by trying to boot your MacBook in Safe Mode. To do this, follow these steps:

  1. Shut down your MacBook.
  2. Press the power button and immediately hold down the Shift key.
  3. Release the Shift key when you see the Apple logo with a progress bar.

If your MacBook successfully boots in Safe Mode, restart it normally. If the issue persists, you may need to reinstall macOS or contact Apple Support for further assistance.

Q: I hear a series of beeps when I turn on my MacBook. What does it mean?
A: A series of beeps during startup indicates a hardware issue. The number of beeps and their pattern can provide specific information about the problem. Refer to Apple’s support documentation or contact Apple Support to identify the meaning of the beeps and get appropriate troubleshooting steps.
Q: My MacBook’s screen remains black even though it is powered on. How do I resolve this?
A: Start by resetting the NVRAM (non-volatile random-access memory) on your MacBook. Follow these steps:

  1. Shut down your MacBook.
  2. Press the power button and immediately hold down the Command + Option + P + R keys.
  3. Keep holding the keys until you hear the startup sound for the second time

A Comprehensive Review: Best VPN Services for Digital Privacy

Introduction

With the increasing concerns about online privacy and security, using a Virtual Private Network (VPN) has become essential for many internet users. VPNs encrypt your internet connection and route it through secure servers, ensuring your data remains private and protected from prying eyes. However, with numerous VPN services available in the market, it can be overwhelming to choose the right one for your needs.

In this comprehensive review, we will analyze and compare some of the best VPN services available, taking into consideration factors such as privacy features, speed, server locations, pricing, and user-friendliness. Whether you are a frequent traveler, a remote worker, or simply someone who values their online privacy, this review will help you make an informed decision.

1. ExpressVPN

ExpressVPN is a top-rated VPN service known for its strong encryption and fast connection speeds. With servers in over 90 countries, it offers a wide range of options for users to choose from. ExpressVPN also has a strict no-logs policy, ensuring that your online activities remain private.

Features:

  • 256-bit AES encryption
  • Unlimited bandwidth
  • Supports multiple devices
  • 24/7 customer support

2. NordVPN

NordVPN is another popular VPN service that focuses on digital privacy. It offers advanced security features such as double encryption and a kill switch, which ensures that your data remains protected even if the VPN connection drops. NordVPN also has a strict no-logs policy and provides excellent customer support.

Features:

  • Double VPN encryption
  • Strict no-logs policy
  • Fast and reliable servers
  • Ad-blocker feature

3. CyberGhost

CyberGhost is a user-friendly VPN service that prioritizes digital privacy. It offers strong encryption and has a vast network of servers in various locations. CyberGhost also provides additional features like ad-blocking and malware protection, ensuring a secure browsing experience.

Features:

  • Automatic kill switch
  • No-logs policy
  • Simultaneous connections on multiple devices
  • Access to streaming platforms

Summary

In this review, we have evaluated several top VPN services to determine the best options for digital privacy. We have considered various factors such as privacy features, speed, server locations, pricing, and user-friendliness. By analyzing these aspects, we aim to provide you with a comprehensive overview of the best VPN services available in the market.

By the end of this review, you will have a clear understanding of which VPN my sources service suits your needs and offers the highest level of digital privacy. Let’s dive into the details and find the perfect VPN solution for you!

Q: What is a VPN?
A: A VPN, or Virtual Private Network, is a service that allows you to create a secure connection to another network over the Internet. It encrypts your internet traffic and masks your IP address, providing you with online privacy and security.
Q: Why do I need a VPN for digital privacy?
A: A VPN is essential for digital privacy as it encrypts your internet traffic, making it unreadable to anyone trying to intercept it. It also hides your IP address, making it difficult for websites and online services to track your online activities.
Q: How does a VPN protect my data?
A: A VPN protects your data by encrypting it, which means it converts your information into a code that can only be deciphered with the correct encryption key. This ensures that even if someone intercepts your data, they won’t be able to read it.
Q: Can a VPN bypass censorship and geo-restrictions?
A: Yes, a VPN can bypass censorship and geo-restrictions by masking your IP address and routing your internet traffic through servers located in different countries. This allows you to access websites and online services that may be blocked or restricted in your location.
Q: What are some important factors to consider when choosing a VPN service?
A: Some important factors to consider when choosing a VPN service include the level of encryption offered, the number and location of servers, the speed and reliability of the connection, the availability of apps for your devices, and the provider’s privacy policy.
Q: Are there any free VPN services available?
A: Yes, there are free VPN services available, but they often come with limitations such as data caps, slower speeds, and fewer server options. Additionally, free VPNs may not offer the same level of privacy and security as paid services.
Q: Can I use a VPN on multiple devices?
A: Yes, most VPN services allow you to use their service on multiple devices simultaneously. However, the number of devices allowed may vary depending on the provider and the subscription plan you choose.

User Experience Reviewed: Top 3 Video Editing Software

Introduction

Video editing has become an essential skill in today’s digital age, whether you are a professional filmmaker or an amateur content creator. With numerous video editing software options available in the market, it can be overwhelming to choose the right one that suits your needs. In this blog post, we will review the top 3 video editing software based on user experience. We will explore their features, ease of use, and overall performance to help you make an informed decision.

1. Adobe Premiere Pro

Adobe Premiere Pro is a widely recognized and industry-leading video editing software. It offers a comprehensive set of tools and features that cater to both beginners and professionals. The user interface is intuitive, allowing users to navigate through the software effortlessly. With its powerful editing capabilities, users can create stunning videos with ease.

Key Features:

  • Advanced timeline editing
  • Wide range of effects and transitions
  • Support for various video formats
  • Seamless integration with other Adobe Creative Cloud applications

2. Final Cut Pro

Final Cut Pro is a popular video editing software designed specifically for Apple users. It offers a sleek and user-friendly interface, making it easy for both beginners and professionals to navigate. The software provides powerful editing tools and advanced features that allow users to create high-quality videos.

Key Features:

  • Intuitive timeline editing
  • Advanced color grading and correction
  • Support for 360-degree video editing
  • Seamless integration with other Apple applications

3. DaVinci Resolve

DaVinci Resolve is a feature-rich video editing software that offers professional-grade editing capabilities. It is known for its advanced color grading tools, making it a top choice for filmmakers and colorists. The software also provides a user-friendly interface, allowing users to easily navigate through its extensive features.

Key Features:

  • Powerful color grading and correction
  • Advanced audio editing
  • Support for multi-camera

Summary

After extensive research and user feedback, we have narrowed down the top 3 video editing software that excel in user experience. These software options have been highly rated for their intuitive interfaces, powerful editing capabilities, and overall user satisfaction. Here is a brief summary of the top 3 video editing software:

  1. Software A: This video editing software offers a user-friendly interface with a wide range of editing tools. Users have praised its simplicity and ease of use, making it suitable for beginners. It provides advanced features such as multi-track editing, special effects, and transitions, allowing users to create professional-looking videos effortlessly.
  2. Software B: Known for its robust features and versatility, Software B is a favorite among professional video editors. It offers a comprehensive set of tools for advanced editing, including color grading, motion tracking, and 3D editing. Despite its complexity, users have appreciated its extensive documentation and online tutorials, making it accessible for both beginners and experts.
  3. Software C: This video editing software stands out for its seamless integration with other creative applications. It provides a streamlined workflow, allowing users to easily import and export projects across different software. Users have praised its stability and performance, making it a reliable choice for video editing projects of any scale.

Whether you are a beginner or an experienced video editor, these top 3 video editing software options offer a range of features and user-friendly interfaces to enhance your editing exp view website erience. Stay tuned for our detailed reviews of each software, where we will delve deeper into their strengths, weaknesses, and unique features.

Q: What are the top 3 video editing software?
A: The top 3 video editing software are Adobe Premiere Pro, Final Cut Pro, and DaVinci Resolve.
Q: What is Adobe Premiere Pro?
A: Adobe Premiere Pro is a professional video editing software developed by Adobe Systems.
Q: What is Final Cut Pro?
A: Final Cut Pro is a video editing software exclusively available for macOS users. It is developed by Apple Inc.
Q: What is DaVinci Resolve?
A: DaVinci Resolve is a professional video editing software developed by Blackmagic Design. It is available for both Windows and macOS.

Budget-Friendly Software: A Review of Cost-effective Options

Introduction

Are you looking for cost-effective software solutions that won’t break the bank? In today’s digital age, software plays a crucial role in various aspects of our lives, from personal productivity to business operations. However, finding affordable options without compromising on quality can be a challenge. That’s why we have compiled a comprehensive review of budget-friendly software options that offer excellent value for money. Whether you’re an individual or a small business owner, this guide will help you make informed decisions and find the perfect software solutions within your budget.

2. Accounting Software

Managing finances is crucial for any business, and investing in accounting software can save you time and money. Some popular budget-friendly options include:

2.1 QuickBooks

QuickBooks is a widely recognized accounting software that offers various affordable plans suitable for small businesses. It provides features like invoicing, expense tracking, and financial reporting.

2.2 Wave

Wave is a free accounting software that offers essential features such as invoicing, receipt scanning, and bank reconciliation. It is an excellent choice for freelancers and small businesses with limited budgets.

3. Project Management Software

Efficiently managing projects is essential for productivity and success. Here are some budget-friendly project management software options:

3.1 Trello

Trello is a popular project management tool that offers a free plan with basic features like creating boards, adding cards, and assigning tasks. It is user-friendly and suitable for small teams or personal use.

3.2 Asana

Asana provides a free plan that allows teams to manage tasks, create projects, and collaborate effectively. It offers additional features like timeline view and custom fields at affordable prices for more advanced needs.

4. Communication and Collaboration Software

Effective communication and collaboration are crucial for remote teams or businesses with multiple locations. Consider these budget-friendly options:

4.1 Slack

Slack offers a free plan that allows teams to communicate through channels, direct messages, and file sharing. It also integrates with various other tools, making it a versatile choice for businesses of all sizes.

4.2 Microsoft Teams

Microsoft Teams provides a free version that includes chat, video meetings, and file sharing.

Summary

In this blog post, we will explore a range of cost-effective software options that cater to different needs and budgets. We understand that not everyone can afford high-priced software, but that shouldn’t limit your access to quality tools. Our review will cover various categories, including productivity software, graphic design tools, project management solutions, and more.

We will discuss the features, pricing plans, and user reviews of each software option, giving you a comprehensive overview of their capabilities and value for money. Whether you’re a student looking for affordable productivity software, a freelancer in need of graphic design tools, or a small business owner seeking budget-friendly project management software, we have got you covered.

Image

By the end of this review, you will have a clear understanding of the best cost-effective software options available in the market, enabling you to make inform More Info ed decisions and optimize your workflow without straining your budget. Let’s dive in and explore the world of budget-friendly software together!

Q: What is budget-friendly software?
A: Budget-friendly software refers to software solutions that are cost-effective and affordable for individuals or businesses with limited financial resources.
Q: Why should I consider using budget-friendly software?
A: Using budget-friendly software can help you save money while still meeting your software needs. It allows you to access essential features and functionalities without breaking the bank.
Q: What are some cost-effective options for budget-friendly software?
A: Some popular cost-effective options for budget-friendly software include open-source software, freemium software, and software-as-a-service (SaaS) solutions.
Q: What is open-source software?
A: Open-source software is software that is freely available for use, modification, and distribution. It often has a community of developers who contribute to its development and improvement.
Q: What is freemium software?
A: Freemium software is a model where the basic version of the software is available for free, but additional features or advanced functionalities require a paid subscription or upgrade.
Q: What is software-as-a-service (SaaS)?
A: Software-as-a-service (SaaS) is a software delivery model where the software is hosted on the cloud and accessed through a web browser. It typically involves a subscription-based pricing structure.
Q: How can I determine if a budget-friendly software meets my requirements?
A: Before choosing a budget-friendly software, it is important to evaluate your specific requirements and compare them with the features and capabilities offered by the software. You can also read reviews and seek recommendations from other users.
Q: Are there any limitations to budget-friendly software?
A: Budget-friendly software may have certain limitations compared to more expensive options. These limitations can include fewer features, limited customer support, or scalability constraints. It is important to consider these factors before making a decision.
Q: Can I upgrade from budget-friendly software to a more advanced solution in the future?
A: Yes, many budget-friendly software